Turning a Fox into a Snake

I tested fitted the roll bar body stainless bezels as well, and noticed that the rubber seal provided for the third leg bar, (the one that angles back from the hoop) wouldn't really make for a weather tight seal. This bezel is oval shaped, where as the ones for the hoop bars are round. The oval bezel is needed due to the angle the bar passes through the body. I had some motorcycle inner tube material, and first using the bezel for a template, I cut out new seals. Once installed, the seal should fit pretty tight around the roll bar, and prevent any water entry, such as when I wash the car. (Hopefully the rubber won't deteriorate too quickly from UV exposure..etc.) I still have to cut the new seal center hole, once I determine where exactly the bar passes through it.

THIRD LEG BEZEL AND SEAL
IMG_3078.jpg


Today I will be working on aligning, and fastening the fender side vent louver. The louvers are supplied as a flat sheet of aluminum, with pre-cuts made in it for the vanes. You carefully bend the vanes out, to the angle you want, before mounting on the inside of the body. FFR suggest that you can simply silicone them to the fiberglass. Some builders have used epoxy, or JB Quick and even RTV to adhere them. A few fellow builders have really gotten elaborate and fiberglassed threaded studs to the inside of the body, so the louvers can be held in place with nuts. Some have used self adhesive Velcro strips, so they can be removed easily. Apparently some builders use this vent hole as an access to their header bolts. I'm still not 100% positive how I am going to attach mine but I do want them removable, at least for the time being, as they need to be pulled when the body goes in for painting. Maybe I'll try the Velcro method..

FENDER LOUVER PRE-FIT
IMG_3077.jpg


Raffle winner! Man was I lucky!
I went to the annual FOR Eagles Club Pig Roast last night, which for the money, is a great feed and a lot of fun. The raffle they held was down to the last two prizes, when my ticket number was drawn. One of the prizes left was a fire extinguisher. This was on my list of things I still needed to purchase, as I wanted to carry an extinguisher in the Cobra at all times. It was also the BC type, which is used for oil, gas, and electrical fires, and doesn't cook the chemical onto anything. The ABC extinguishers were known to have this issue, in that any hot surface, the chemical used in them, was sprayed on, it adhered to and is a real bitch to get off...
Nice to get lucky once in awhile..
biggrin.gif
 
BUILD PROGRESS

Small steps in the way of progress the last several days. I didn't realize how many little things I still had to do before putting the body on for the first time.
Ideally I could use four people, in addition to myself supervising, to drop the body on safely. It can be done by only two people, and one builder somehow, with the help of sawhorses, and tie down straps, actually did manage it on his own. I wish I had a video of that!

The reason four people to help is ideal, is because the process involves first hooking the nose of the body over the front of the chassis, and then while slowly lowering the back end, having people support each side, (especially under the door openings), as well as pulling out and hooking under, those areas at the sides of the chassis. The back end is then dropped down and pushed forward slightly. It can be an awkward process without the extra hands. There is always the chance of the body cracking from stress under the door openings as this is the narrowest area of the fiberglass, if not supported in these areas..

First I had to install the body side fasteners. There are four frame points on each side ahead and behind the doors, low down in the sill area. The frame already has plates welded in these spots, so it was a matter of slipping these specially designed speed nuts over the plates. Seven of the clips went on without any fuss, but one was a bit of a challenge. The eight body mounting bolts then pass through the body and into theses speed nuts.(The other points the body is fastened to the frame is at the front vent holes, and the rear bumper mounts).

That accomplished, I then installed the Weather-pack wire harness connectors on to all the lights. This allows you to simply plug in the lights once the body is on. Makes for quicker removal of the body later as well. I goofed up on this job initially. "DOH" I wired the male light connectors using the wire colors exactly the same as the female connectors on the chassis. Tested them all with a battery, worked great..OOPS.. I realized while checking the high/low beam for the headlights, that I should have wired the male connectors with the "mirror image" of the female ones on the chassis. Here I thought I did such a great job..Crap..I had to pull all the wires back out of the connectors and re-do them in the proper order..

I was looking at the instructions Factory Five has for you to mount the inside rear view mirror. The instructions seemed a little short on info for this job. Apparently they want you to slip these small nylon spacers between the body, and the upper metal dash frame hoop. Drill holes through the body and into the frame hoop, and then using self tapping screws thought the base of the rear view mirror, tighten the mirror down into these holes. Sounds easy, but this entails lifting the body slightly, while slipping the spacers in, and hoping they stay in place once the body is lowered, and that the holes in the body remain aligned with the ones in the frame.
I had heard that the mirror mounted in this dash position, leaves a lot to be desired view wise. I decided, (as some other builders have done,) to mount the mirror to the top of the windshield frame instead. The rear view is 100% better mounted in this position, but it does entail making a custom bracket for the mirror to mount to.
I used a piece of aluminum angle, which I cut to the desired length, then shaped by rounding off the sharp corners, with a grinder. Then using different grades of sandpaper, I smoothed then finally polished the piece. Two holes for mounting the mirror to it needed to be drilled, as well as two where it will attach to the windshield frame. It should look good when finally mounted, and saves all the fooling around with the drilling of the body/dash frame.
CUSTOM MIRROR MOUNT
IMG_3079.jpg


This is a picture of how another builder did his, to give you an idea of how it all comes togeather.
mirrormount.jpg


The next job was to drill and cut two holes for the defog vents that sit on the body in front of the dash. Again the directions were vague as to how to do this, and no dimensions as to where to cut the holes in the body were given. Obviously you want them in front of the driver, and the passengers view through the windshield, to keep this area clear of any fogging. Since the windshield is not on the body at this point, it was hard to reference exactly how far forward from the dash they should be.
In my case the lower plastic ducts provided with the heater, that the upper chrome bezels attach to, where a little large for the space under the dash on the passenger side. The heater was in the way. There was room on the drivers side, but the bezels would not match up side to side, and may look awkward if done this way. HMMMM?
I began thinking seriously about installing ball, or flapper type vents instead of the stock ones. I could control the direction and volumne of airflow with this style vent. I could also install them up so they mount the same on both sides. The supplied defogger vents, do not have any controls on the heater, or the ductwork, to be able to turn them on or off. This meant that I could not redirect additional hot air down into the lower cockpit area. The vent outlets in the lower cockpit areas are controllable, so I could direct more air to the defog vents, if needed, but not the other way round. There are several vehicles that use these ball, or flapper type dash vents, including the newer Mustangs, and Ford trucks. I have to prowl the wrecking yards over the next few days and see if I can come up with some that will work.
It almost seems redundent that an open top, fair weather only car, needs defrosters at all, but I gather that you need them to pass inspection..
STOCK DEFOG BEZEL AND DUCT
IMG_3080.jpg


I also did some trimming and tweaking on some of the aluminum panels that will go on the car after the body is fitted. I needed to make "pass thru" spots for some of my wire harness's, and bend a few panels a tad, so they would sit flush when mounted. These panels are for the front and rear wheel house areas, as well I have some pieces that need to be installed in the nose of the car, around the radiator. These ones fill in the area around the radiator, and help re-direct air flow coming through the "mouth" thru the radiator, to ensure adequate cooling.
RADIATOR ALUMINUM PANELS
IMG_3081.jpg


Still to do..Many builders coat the underside of the body in the wheel houses, front and rear. This is to add protection from rocks caught up in the tires, and flung into the fiberglass. Apparently this can cause "stars" in the final paint as the stones bruise the body shell material. Some builders mentioned using spray on truck bed liner, or spray type rubberized undercoating. Lordco had some bed-liner on sale recently, so I picked up a few cans of that to try. Apparently it is stronger than the regular undercoating, resists the stone bruising, and helps waterproof the raw fiberglass. It also helps the "look" in these areas, rather than just seeing fiberglass. This job is best done while the body is still off the chassis.
 
I also want to spray coat some of the aluminum panels around the wheels, such as the rear of the cockpit, and the splash panels. This protects them from rocks flying into them, as well it apparently make the car sound more solid. No tinny pinging sounds from pebbles bouncing off the bare aluminum. I will use the rubberized spray undercoating for these areas. It will entail some masking of some of the brake, and suspension components to ensure they don't also recieve a coating.

So in spite of the fact that I thought I was ready to stick the body on several days ago..there is still some work left to be done before the "big day"..Better to take care of these small things now, as it may not always be easy to round up four people at the same time, to be taking the body on and off to complete these things later..
I just hope I don't forget some important thing I should have done...
ohsnap.gif


A DAY AT THE WRECKING YARDS.
Wow.. wrecking yards that are usually the muddiest places on earth during the wet season, sure can get dusty during the dry season. I felt like I was walking on the moon, with every step causing this talcum powder like dust, to billow up around me. In spite of that, I still enjoyed my trek around a few of the Vancouver Island's last remaining "pick and pulls".
It seems that many auto wreckers have gone all modern and uppity the last several years, not interested any longer in the "do it yourselfer" business, but now aim for the lucrative collision insurance business. I had one wrecker tell me he wasn't interested in my needs at all, complaining that he would need to send a $25 an hour employee out with me into the yard to find what I needed, and it just wasn't worth it to him. I didn't know guys working in junk yards got $25 an hour..? Huh..

I'm sure that any of you that have wandered the pick and pull yards looking for that illusive part, have experienced the wonderfully weird/sick sensation that comes over you. I'm awed at the devastation of what once were someones pride and joy, and somewhat sickened knowing somebody was probably injured in some, yet I'm excited by all the cool parts
What always surprises me is the personal items often left in the vehicles. In one car I found a 95% empty bottle of prescription methadone. Hmm wonder why this car got in a wreck..Many cars still had kids toys, tools, baby seats, canes, walkers, pillows, condoms, food wrappers, and pocket change, Lots of pocket change! If you scrounged around enough you might be able to get enough to pay for the part your looking for..lol
Seems lots of books are left behind, everything from the bible, to pornography..now why would you leave that behind..lol? I wonder if they end up selling some of that stuff?
Other common objects left in many of the wrecks was empty beer, and booze containers! Where's MADD when you need them?
Some of the cars had some very interesting molds growing in them, which made me hesitate to climb in, others had some very "off" smells eminating from them. Perhaps a trunk full of grocerys? Yuck! Some very interesting looking toadstools were growing in some..wonder if they were magic..lol

I suspect some of the wrecks are home to rats, coons, snakes, skunks, and for sure spiders. Keep this in mind if your feeling around under the seats for coins..I found some Crappy tire money in one car, and as I was leaving I thanked the yard worker, and said "Here's a fifty for your trouble", while stuffing a .50 CT bill in his pocket..lol (He actually gave it back to me..) I also pointed out to him where I suspected some of his tools may have been left behind while stripping a car. I found a nice floor jack beside one car, that was propped up with only a wheel rim. Sockets and crescent wrenches were others that I spotted and pointed out which cars had what sitting on them, (I stuck them on the roof).
Some cars were propped up very precariously, and looked like they could tumble over on to you, with just a slight breeze. I stayed away from those, and the ones that were double stacked..Too bad, as there were a few potentials amongst them.

But I digress..I did manage to find what I was looking for, although it took three different cars at two different wreckers. I can't believe how many cars have rectangular or square dash vents.. I ended up with two passenger side dash flapper/ball type vents from Toyota MR2's, and another from an old Celica. The Celica one had a Chrome finish, which I decided not to use because of the windshield reflection issue I had been warned about. One of the MR2 vents was black, the other one was maroon. I opetd to paint them both black to match each other. (There's lots of shades of black).
I first cleaned them using a toothbrush, and compressed air, as they were pretty dusty. Then I sprayed them down well with the SEM Plastic Prep. This removes any grease, oils, or chemical residues, (that tends to ooze out of some plastics over time), and allows the SEM interior paint to adhere properly.
As the base of the vents were slightly larger than the duct hose that my heater came with, I stopped off at the plumbing section of the local hardware store, and picked up some ABS fittings that would allow me to reduce the openings to the 2" size I needed. The Toyota vents are made of ABS plastic fortunately, so I was able to use ABS solvent glue to joint them all togeather. First I had to cut the ABS fittings, and pipe, to reduce the overall length. I just need enough to slip the duct hose on, and also didn't want them interfereing with items under the dash. In this picture you can kind of grasp what my plan is.
CIRCULAR DEFOG VENT
IMG_3083.jpg


So now I now have to carefully measure where in the cowl area I need to install these, and drill some holes. I will drill slightly smaller holes initially then using a rat tail file I will open the hole up untill I get the perfect fit. I don't want the vents dropping through if I hit a bump in the road..oops..

As the Roadster body was in shadow by afternoon, I took the opportunity to climb under the snakes body and painted the underside of the fibreglass with some black fibreglass epoxy paint. I had already sprayed the wheel wells with the spray on bedliner I had bought, but I wanted to coat the other areas of the raw fiberglass. This will seal the fibreglass from oils, road grime, and moisture, that could be absorbed otherwise over time, and perhaps affect the final paint job. I was able to finish all the areas, other than where the body rests on the body buck, before supper. Looks far better now..
(note..I was not very impressed with the spray on body liner, (EZ-LINER). It wasn't as near as thick as I suspected it would be. It may add some reinforcemnet to the underside of the fibreglass, but I really can't see it really being effective against stone hits, that may "star" the glass.)

I have to decide if I should leave it as is, get it done at the body shop, or to add a layer of the spray on 3M rubberized undercoating. I have some of this 3M product which is supposed to work well, but had plans for using it on some of the underside chassis aluminum panels rather than the fiber glass. My other choice is to get the painter to spray on some of the flexible anti-chip product that is often used for protecting rocker panels on modern cars, such as 3M's Rocker Panel Guard. That should be pretty resiliant, I just hope it will adhere well to the bed-liner I already applied.
 
BRAKE AND OIL COOLER GRILLES

I was at this Industrial kitchen supply store, when I spotted this object that is used for making pizza crusts crispy. Basically a big round piece of aluminum screening, with support edging, that you would cook the pizza on. Hmmm! only $7.50 and I could have the grilles for both my front end brake ducts, and oil cooler inlet!
You can but these grilles already pre-formed to fit from the US, but would add up close to $50 bucks US. I decided to try making them myself.

As the body is not on the chassis yet, I was able to hold the screening material up behind the inlet openings, and simply trace the opening, with a Sharpie on to the screen, I then carefully cut the screening, allowing for some extra overlap needed, to fasten them to the body. I then took the cut out sections of screen, and kind of formed the overlap to fit behind the openings. Once I had the basic shape, I still needed to make the bends nice and defined. Using the old section of the Mustang fuel filler pipe locked in the vice, I did a little shaping with a rubber mallet. I test fit them a few times, and when all looked good to go, I sprayed them with a coat of clear. Aluminum can get that white powdery oxidization after awhile, so I figured the clear would prevent that.
PIZZA PAN CUT OUT

IMG_3095.jpg

IMG_3096.jpg


Bloody Lucas windshield wiper sytem..Grrr

I have been playing around with this archaic wiper system for a couple of days now, and still can't seem to get it all working as it should. Seems most if not all builders have had their fair share of problems with them. I gather that this system was originally designed by Lucas, back in the fifties, or even earlier, and has not evolved over the years, It surprises me that FFR hasn't come up with a more modern type wiper system, but I suppose it lends some originality to the cars.

The system involves an electric motor that moves a geared cable back and forth. The cable passes through the two wheel boxes that have gears inside them which turn the wiper arms. This is where i am having my issues. The cable needs to move without any binding as it passes through the wheel box. The cable is housed in tubing to keep it lubed, dirt free, as well as to guide it. On either side of the wheel box's and at the motor, you need to fit these tubes, with a flare fitting to hold them in place. Problem is the transition from the tubes to the wheel box causes the cable to be slightly skewed..it sort of has to step up out of the tube, pass under the gear, and then step up again to enter the next tube. This causes binding, and the cable won't move back and forth freely as required. The tubes also have to have a gradual bend in them from the motor to the first wheel box, then again to the drivers side wheel box. They kind of bend to match the body contour above them. I think this doesn't help either..

Some builders have posted on the builders forum that you need to tweak the area the cable passes under the gear to get things all "lined up" correctly. It seems with mine that when I do get the cable to move freely, the wheel box gear no longer makes good contact with the cable, and tends to skip..Bloody frustrating, but I shall persevere!

Darn shame these are actually required to get past inspection, as I doubt they will rarely, if ever, get used..this is definitely a fair weather only car!

"Lucas, The Prince of Darkness", was a common jibe used, as their archaic electrical systems were always causing people grief, often leaving them stranded at night when their lights suddenly went out. I imagine the Japanese are happy this is one area in car manufacturing that they didn't copy..lol


I had my daughter and her family come to stay here for a two week vacation, so pretty much everything came to a standstill on the Cobra build..just getting back to it the last few days.

I haven't had enough manpower on hand to drop the body on the chassis, although I have been doing some recruiting, and hope to get the initial install done this week. In the meantime I was taking care of several smaller things.

MORE WIPER PROGRESS

I horsed around with the stupid wipers a bit more. The lower spacers supplied with the wiper kit, are simply made of rubber hose, They are terrible, and have always been an issue with the wiper installation. The builders forum explains how you can make better replacement ones using PVC pipe. You need to cut it on an 45* angle so it holds the shaft correctly when it passes through the body. There is an equivilent 45* chromed spacer on the top of the shaft, above the body. Tightening a nut on the top of the shaft then sandwich's the wheelbox between these spacers, to the body.
Having made these I then measured and cut a section of copper tubing. Using a pipe flaring tool borrowed from my neighbor. I single flared both ends of it. This is to hold it in place in the wheelbox's, and what the drive cable passes through. The other sections of tubing that go between thewiper motor and the passenger side wheelbox needs to be measured, cut, and ends flared, after the body is on the chassis.
UNDERSIDE OF BODY-WIPER WHEELBOX AND TUBING
IMG_3099.jpg


TOP VIEW OF WIPER SHAFT AND BEZELS
IMG_3098.jpg
 
TRUNK LICENSE LIGHT WIRING

I figured that running the wire harness for the license plate lamp, would be far easier to to before the trunk is on the body.
The wire harness runs from the frame, near where the trunk hinge is fastened, in to the trunk fiberglass. First I had to drill a hole for the wire to pass through. I opted to put a grommet at this point to prevent the wire chaffing, when opening and closing the trunk lid. I then fished the wire through the trunk lids inner and outer shell, and back to the point the light will be positioned. I decided to use a connector for the wire harness, so I could simply unplug it when I need to take the trunk lid on or off. I know this will happens several times in the final fitting of the lid, before paint. To prevent the wire from rattling in the trunk lid, I used some scrap pieces of self adhesive Dynaliner foam, and wrapped it around the harness in a couple of places. After the trunk lid is installed all I have to do is install the light and plug the harness in.

LICENSE LIGHT HARNESS INSTALLED
IMG_3101.jpg


While looking at my air intake and filter location, I realised that with it being as close to the headers as it is, it could get fairly hot. When the car is moving along there should be some good cool air moving through this area. The hood scoop, and fender vents will all help with that. It's when sitting in traffic things may get a tad warm..
So I decided to add a heat deflector, hoping that would help.
I cut and trimmed a piece of aluminum, and mounted it to the frame, using self tapping screws. This now sits directly between the headers and the intake.. Not the greatest but I hope it helps.

AIR INTAKE HEAT DEFLECTOR
IMG_3100.jpg


The last thing I did was to pull the side pipes back off in anticipation of installing the body. Those stoven nuts are a bitch to loosen! Hopefully they will keep the side pipe to header nice and tight in future.

So a little more progress anyway..

I imagine some readers may be wondering what the piece of wood I had duck taped to the body, (as seen in the earlier picture with the wiper bezels), was used for.

That is actually used to stiffen the body when it is lifted, to prevent flexing. If you lift at the front and the rear, the under door sill area would take a lot of stress, as the section of body is quite narrow there. The wood piece keeps it from flexing and possibly cracking this area. It is cut at either end to fit in the cockpit opening, spanning across between the rear cockpit, and the dash area. The duct tape just keeps it in place while the body is being moved.
Heres another picture so you get the idea. (You can also just barely see the spacers I made for the wiper wheelboxs as well, least the passenger side in this photo).
IMG_3097.jpg
 
[h=2]BODY ON[/h]
I managed to gather enough manpower together, to finally put the body on the chassis for the first time.

IMG_3102.jpg


IMG_3103.jpg


IMG_3104.jpg


Now that it was on, I could start to look at areas that I had concerns as to how it was all fitting. The drivers dead pedal extension was one area of concern, but as it turns out I shouldn't have worried, there was plenty of clearance at that point.
I installed the side body mounting bolts, and they all lined up with the holes on the frame except for the right rear. I couldn't figure why they would be out of alignment as when the kit first arrived the body was bolted to these points..I was concerned that the body may have warped after sitting outside on the buck for 18 months. After shifting the body around I did manage to get them to line up, but it was pretty tight getting the bolts in.

I also did some measurements for the wiper cable tubing now that the body was on. This is the tube that runs from the wiper motor, mounted on the chassis, to the passenger side wheel box mounted on the body. This measurement couldn't be done before the body was on.

I also drilled some some small holes in the body above the dash area, where I intended on mounting my defogger vents. I dropped a rivet pin down through the holes, and then reaching up under the dash to feel where they protruded. I was able to ascertain that the vents installed in these spots wouldn't interfere with anything under the dash, or be obstructed by any of the chassis framing.
I took the opportunity to do a little pre-fitting of the nose aluminum. There was quite a bit of trimming involved in getting these panels to fit properly, but doing this now will make it easier when the body is dropped on for the longer term.
I found after setting my roll bars in place, that there was going to be some enlarging of the body's pre-cut holes required, as there was some interference at certain points. The windshield that comes with the kit, can't be fitted till after the body is in place, so I did some work on this. I have to enlarge the body holes here slightly as well as there was some interference at the posts on either side.
I plugged the head and taillight connections in and tested them all, as well as the DRL's, which I apparently need to have operating to pass the final inspection. All worked great, with the exception of one turn signal indicator light on the dash. When I signal left, the right hand indicator lights up. It also lights up when I signal right, as it should, so somehow I goofed on the wiring of this..Hope it's something simple..

So after all this, and having marked all these spots that needed slight adjusting, I again gathered a few people, and pulled the body back off, and put it back on the buck.​
 
I used a small drum sander mounted on my drill, to enlarge the roll bar holes as needed. The course grit drums worked great, and I soon had fiberglass dust flying everywhere. I used a small drum sander on the dremel for the windshield post slots, and enlarged them as req'd.
IMG_3105.jpg


The holes for the deffogger vents I initially cut with a 2-1/2" hole saw, then carefully enlarged it with the drum sander, until the vents fit in nice and flush on the body. I was pretty happy with the end result for these, as it has never been done on one of these cars that I am aware.
IMG_3107.jpg


IMG_3110.jpg


As you can see from the above pictures it's sitting pretty high up in the front end. To do this I just need to jack it up, and adjust the Koni Coil over shocks. This is the bonus of having adjustable shocks.

After doing all this hole enlarging/drilling, there was a lot of dust as you would expect, so I washed the body down inside and out, and hope to be able to put it back on the chassis today.
I can then begin fastening things down in earnest, installing the roll bars, rear view mirrors, windshield, nose aluminum, bumpers, back up lights, etc, etc., I will have to align the headlights, and do a wheel alignment to get it ready for the road, and the final vehicle inspection.
If all goes well the body will only have to come off one more time for final body work and painting. This may be several months away, but at least I can drive it!
[h=2]BUILD CONTINUES[/h]
I spent a couple of days fiddling around with some items that needed to be finished before the body went back on again.

There was the question as to whether I wanted to drill the vent hole in the rear body, (between the roll bars which would be the air intake for the footbox cooling blower), now, or later, when it was in for body work/paint. I decided that any work I could do now, would trim some time off the labor I will be paying for.
After some carefull measuring I used a 3" hole saw and cut the new vent hole. The small scoop that is going to be fitted over the vent needed some trimming and sanding, so that was done as well. after I spray bombed the vent and the scoop. The scoop I plan on riveting on, for that "race car" look..
I could see it may be a bit tricky to run the duct hose between the footbox blower intake, and this vent, as it will need to have two sharp bends in. The flexible aluminum duct hose I have on hand seems to resist these tight bends, so I may have to use a plastic type. Some experimentation needed in this area still.

I also noticed that the tailight lenses had a small variance at one point on the lens. In comparing the left to right, and upper and lower, I could see they were not all in the same oreintation to one another, You would never notice the difference unles you practically had your nose up to them. I thought, why not fix this now when the access to the lights is far easier than when the body is on the car, so off came three of the lights, for a 180* spin around. I checked the front signal lights but I could see no lens variance so I was good to go on them.

I have this grille material I am going to use temporarily while I build the stianless steel slatted grille. The huge mouth in these cars is just an invitation for a rock to puncture the radiator, so I felt I needed some protection. It was tricky to trim the heavy mesh material to the correct size, but my friend Larry got out his heavy duty tin snips, and proceeded to trim away at it. we then fitted it in behind the mouth, and used some button head screws and lock nuts to mount it to the body. (As you will see, doing this at this stage of the build would come back to haunt me)
frown.gif


We also took the time to lower the ride height of the chassis at the front to 4-1/2", which seems to be a common measurement amongst builders. After lowering it off the jack, we immediatelly noticed that this changed the tow-in, and the camber of the wheels. The camber is controlled by he adjusting the tubuler upper control arms, and the toe of course nby the inner tie rod ends. So we fiddled around with these until we got things looking good again. I still need to do a proper alignmnet before I do any amount of driving. I will take it to an alignment shop for this.

On Wednesday another buddy showed up, so we took advantage of the extra manpower to lift the body back on to the chassis. This hopefully, will be the last time, until final body and paint is going to be done.
Now we could start fitting the remaining items that still had to be installed

The front wheel aluminum splash panels have some larger bulb seal pressed on to the edge of them, where they make contact with the underside of the body. They are then pushed and wiggled into place. One edge of the panel meets the "F" panel that was already riveted to the chassis. Once situated correctly we then drilled holes through the splash shield,and into the F panel, then riveted it home. We did the same to the other side, and were quite happy with the result. I had read of some builders having a lot of trouble getting these to fit properly. We either got lucky, or we did it all wrong..lol

The next step was to install the radiator side aluminum panels, which I had fitted and trimmed the first time the body was on. Woops.
eek.gif
..Now the grille was installed, how the hell was I supposed to get these panels in place? They need to go in through the mouth to be riveted, and with the grille in place already..damn...
Sooo..it looks like I now have to remove the grille, which was a bit tricky to install, because of the position of the upper mounting bolts. Putting it back on again afterwards should be a real riot, as my arms are just barely able to reach the upper bolts, as it is.
I guess in my haste to "get er done" I overlooked this part of the build sequence, which is all so important, if you don't want to have to keep pulling things off, and re-installing them. Oh well..what can you do?

I'll post some pictures later .​
 
[h=2]Couple of pictures[/h]
Here is a shot of the rear bumper installed.

IMG_3111.jpg


Here is the makeshift grille I will use for the time being. I thought it turned out pretty good.

IMG_3112.jpg


In this picture I have the roll bars installed, with the base bezels on the legs. At this point we have also installed the windshield, and the rear license plate light. I added an original 1965 BC license plate, but unfortunatley I won't be able to leave this on, although I can drive it with the temporary insurance, until it is registered completely, and I get the new 2010 plates. The AC rear emblem is also in place, although hard to see, as my camera battery was dieing, and the flash wasn't very bright.
rolleyes.gif

They can't be sen in this picture but the windshield wipers are also installed at this point.

IMG_3114.jpg


The next few days I will install the reverse lights, the doors, rear view mirrors, the hood, and the side pipes. I'm also going to stop off at ICBC to start the ball rolling on the VIN application. Hopefully I'll have it all ready to go by the time the inspection shop calls me, to let me know they have my VIN plate. Then I have to take it through the highway scales, and get a wheel alignment, prior to the inspection itself..

I am amazed at how much work is involved in the final fitting of all these items, and the time it takes. The thing I hate the most is knowing that many of these items will have to be removed again for final body and paint work.. I do not look forward to removing it all, and then putting it on again..
rolleyes.gif
It's not hard work, just awkward work. Some of the bolts are in very hard to reach spots, and are stressfull on the arms/hands. I feel like I had a gymnastic work out at the end of some of the jobs..Got to keep at it though, summer is slowly winding down.​
 
[h=2]Closer to the Finish Line[/h]
BODY FASTENING

According to the FFR, manual, your are to begin fastening the body to the frame starting at the rear. The body at the rear is held in place by therear bumper bolts and sleeves. The long bolts that attach to the frame pass through the pre-drilled holes at the rear of the body.
Stainless steel tubes, called sleeves, are installed as the bolt is inserted. One goes between the frame and the inner trunk floor aluminum, another goes between the outer trunk floor aluminum, and the inside of the body shell, another between the outer body, and the bumper hoop, and then finally another short one that goes between the hoop and the over rider. The bolts are inserted starting from behind the frame, and end up threading into the overrider, which has been drilled and tapped already from the factory. When the bolt is snugged up, the sleeves all of which have washers at the end of them where they meet the body or the floor, pull all of it together firmly.

The sleeves are all cut to a pre-determined length, but as we found, they are not always the correct length. Initially we used them as they were, but found that the lower rear of the body was pulled in to much by them, and this caused the trunk lid to not fit in the opening correctly. The edge of the trunk lid was visible, and the gap was off. We had to determine which sleeve was causing this, and then lengthen it by adding more washers. It took a few tries to get it correct, but it finally looked good.
The manual calls for you to drop the gas tank, so you can insert the upper bumper bolt on the passenger side. This is because the shape of thegas tank, if left in place would prevent you from being able to insert the bolt from behind the frame. The builders forum revealed a unique method of preventing this dropping of the gas tank, thankfully, as I really didn't want to do that if at all possible. Using some ready rod, (also known as All Thread), cut to length, you can insert this from the body side, inward to the frame.Two nuts are spun on to it, as you insert it, to go between the frame and the trunk floor. These are tightened against one another to become jam nuts. This allows you to turn the All Thread, to tighten it into the bumper overrider. Another nut is used at the back of it to snug it the whole thing to the frame, once its all set. An advantage of doing it this way, is that in the case of a rear end accident, the all thread will not simply punch back into the fuel tank. The jam nuts would prevent this.
IMG_3140.jpg


IMG_3133.jpg


The body side bolts of which there are eight, pass through the lower body sill, and into the frame. You cannot install these until after the windshield, front splash shields, and the doors are installed. All unique and time consuming jobs in themselves.


The windshield needs to be pushed down slightly on the body, to allow the lower windshield frame seal to work effectively. This downward pressure will determine the body positioning along the sills.
The front aluminum splash shields (mentioned previously) have some bulb seal that goes between them and the body. This is so the aluminum doesn't rub the underside of the body, as well it creates a seal between the two. This can also effect the body alignment, as it tends to push the sides outward slightly.
The doors have to be installed because the body in the sill area may need to be shimmed, so the door fits flush with the opening. You kind of align the body to the door, rather than the door to the body like most cars..The kit includes a pile of washers to do this body spacing, but using them would entail removing the bolts, inserting a washer, or washers depending how many you need, then re-tightening the bolt. The you need to check the body to door fit, after the bolt is tightened, and if not correct, remove the bolt again..etc, etc. Quite a pain in the butt..
err.gif

I decided to use body shims, (also known as fender shims). These are U shaped, which allows you to simply loosen the bolt, and slip another shim in place, or remove one as needed. They are available in 1/8" and 1/16" thicknesses. I bought quite a few of each size as I wasn't sure how many I may need. These shims are inexpensive and a great time saver, so keep this in mind if you are doing this kind of work someday.

The doors, like the hood, and trunk lid, are purposely made slightly oversize from the factory, around their edges. The edges need to be sanded down until they can fit into the body opening properly. This oversizing is to allow a builder/bodyman, to establish the proper "gap" from the body to the panels. Proper gapping is important to the overall look of the car when finished. Occasionally you will see a collision shop repair that was done where the gaps are horribly uneven. This is usually an indication of poor workmanship. (In fairness though, with the Insurance company's pushing the use of poor quality, cheap, off shore counterfeit parts for collision repairs, the bad gaps are often caused by these crappy parts not meeting OEM factory standards.)
Heck, in some cases the gaps are set wrong right from the factory, on brand new cars. Pride of workmanship has been lost to a degree..

So anyhooo, we had to sand the door edges down bit by bit, testing their fit over and over, till they looked fairly good and fit in the opening well. The final gap will be done prior to painting. We just wanted to be able to get them on for now. A belt sander carefully handled by my friend Larry, who has years of woodworking experience, sped this process up. If your not familiar with a belt sander, this may not be the best tool to use, as it would be easy to remove to much material in a hurry..
The door hinges have some up /down, in/out, and back and forth adjustments, so this also helps getting things all lined up with the body opening at the top and ends. It's not all dependent on the sill shims.

So we did all this, and were finally satisfied with the fit, so we move on to fastening the front of the body to the frame. This is where it gets odd.
Unlike the rear, the front bumper bolts/sleeves really don't fasten the body to the frame. The holes on the body that the bolts pass through are far larger than the rear, and the sleeve is simply one long sleeve. No pinching of the body between the sleeves is allowed for. Huh..
Looking to the manual, I see that the body is fastened to the frame in a couple of areas. One area is via the inside rear view mirror, which normallyis screwed down above the dash to the body, the screws which pass through to the framing above the dash. Hmm.. My inner rear view is mounted to the upper windshield frame, as discussed earlier in this thread. I could still install screws in this position, but I would need to make a plate to replace the mirror base, so the screws have a point to pull the fiberglass down solidly. Screws alone, could perhaps pull through the glass eventually, although the windshield is helping to hold the body down. I'll have to think/study this a bit more, before making a decision.
The other points the body is attached to the frame, is along the front hood opening along both sides. Supplied small rubber grommets are used under the head of the screws to prevent pull through. As well they help the hood edge to sit even with the body, as they second as spacers. There is a variety of grommet sizes supplied to help with this.
One of the issues with this method of fastening the body, is that my hood opening side edges don't sit evenly above the frame. This is apparently a common problem for builders. To get the body evenly spaced at the wheel openings from the tires, the body sits slightly askew. This is because the body shell when laid up in the mold, is not exactly a mirror image from side to side.
This is a result of the mold measurements when constructed, being transfered from an original aluminum bodied Cobra . The original Cobra aluminum body's made by AC Cars for Carrol Shelby were all hand formed. In some cases one worker formed the right fender, while another formed the left. None of the originals were exactly the same as another, and it is commonly known and accepted, that they were not perfect. It's not like modern day cars where the panels are simply stamped out in a huge press, using a die.
It looks that I can line up some of the hood opening edges with the frame, to insert screws, but there are a few spots where the screws may not. The frame at this point is only 3/4" wide, so it doesn't allow a lot of choice as to where to put the screws. As well, the "lip" on the body that the screws go through is a narrow strip,
I will have to research what others have done about this. Perhaps a few screws will do, although at speed the front "mouth" of the body could cause air pressure to try to force the body upwards, if it's not properly secured.

 
OUTER REAR VIEW MIRROR INSTALL

I needed at minimum, a left side outer rear view mirror to pass inspection. I ordered the optional right side mirror as well. I have driven trucks of one sort or another for the last 35 years, and I really miss a right hand mirror if driving a car that doesn't have one. It seems almost superfluous having mirrors on a small open top car, as you should always shoulder check anyways . Certainly there is no blind spots if you crank your head around either way..lol Being an open top, you can also tend to "sense" a vehicle near you. Regardless I need to install them.
I sat in the drivers seat, and Larry positioned, and adjusted the mirrors at different points on the body, until I had a good clear rear view from them. He then marked the position, and using the base gasket as a template, determined where to drill the holes for the self tapping screws that came with the mirrors.
I had heard that many builders weren't satisfied with their rear view as the rear wheel "humps" tended to block it. many have opted to buy or make, custom brackets that attach to the side of the windshield posts. It may be because of my being tall (6'2") but I had no issue with the view. The right hand mirror has a convex lens as well, so a glance at that mirror more than covers anything on that side of the car.
It will take a little getting used to them, as they are about 1/4 the size of my truck mirrors..even the inside one is much smaller than I am used to.
IMG_3136.jpg


FRONT BUMPER HOOP INSTALL

I bought my kit from FFR when they had a "special" on the roaster kits, that included all the "Appearance package" options, at no extra charge. This Appearance package included, full front and rear polished stainless steel bumpers, side wind wings and tinted sun visors, leather steering wheel, and chromed drivers side roll bar. A saving of approx. $2500 US. They have these specials from time to time, so keep checking if your thinking of buying one. (In my case I opted to horse trade a little, and had them delete the chrome drivers roll bar, and instead provide me at no extra charge both driver and passenger side roll bars in black powder coat.)

FYI. The base kit does comes standard with front and rear racing style "Quick-jacks" bumpers, that were used on the original competition Cobras. These are plain steel, and need to be painted, powder coated or chromed.

I had my bumper over riders already installed at this point, but I had to align the hoop with the mouth, then drill holes in the over riders for the hoop to bolt to. Initially I clamped the hoop to the over riders, so I could stand back and check it for alignment, and adjust as needed. I then marked the spots to drill the two holes per side. Well that's where the fun began.
The over riders are extremely high grade stainless steel, and damn near impossible to drill through. I started with a small 3/16" titanium bit to make a pilot hole for the bigger 3/8" bit. It barely made a mark! After five minutes of trying, I finally gave up, and tried another HSS bit..No go on that as well..I ran down to Lordco and picked up two cobalt drill bits. Not cheap! I tried the small one and it wasn't really doing much, as I couldn't put enough pressure on the over rider without fear of bending the mounting bolts..sheesh..In desperation, I removed the over riders and headed over to a neighbor, who I knew had a drill press. That made all the differene in the world, and the holes were soon drilled out.
The stainless steel button head bolts that were supplied with the hoop to fasten it to the over riders, turned out to be to big to fit through the pre-drilled holes in the hoop. Great. It was easier to buy new smaller diameter bolts ,then to try and frill out the bracket on the hoop. There was no way I could hold the hoop in the drill press.

So finally the hoop was installed, and I thought it looks pretty good on the car.
IMG_3137.jpg


FRONT INNER SPLASH SHIELD INSTALLED
IMG_3141.jpg


WIND WING AND VISORS INSTALLED
IMG_3138.jpg


DOOR TRIM AND CHECK STRAP INSTALLED
IMG_3139.jpg
 
IMG_3130.jpg

quote_icon.png
Originally Posted by Darren5.0L

Looking good Bill, maybe I missed it earlier but what is your final color scheme going to be? Great writeup, I've always resolved that if the '95 ever bit the dust, the powertrain would be salvaged into a Deep Forest Green FFR.


Darren, Actually, I originally decided to go with a dark green.
food-smiley-004.gif

I wanted to lend a bit of the British orgins, IE British Racing Green, to the car, as a bit of a tribute to AC Cars of England, the roots of the Cobra. The trouble is I didn't want a plain green which the BRG color is. Ivy Green Metallic is a color I really liked, but I also like the Highland Green, which is the original Bullet Mustang color. I think the back pipes and roll bars, and no stripes would work with each other well. Here's a few Cobras in green.
IVY GREEN METALLIC
Cobra025.jpg


NOTE- This build thread was written some years back, so many will know I finally went with the Ivy Green Metallic .
 
Bill Reading this thread is fun, all the work it takes makes me tired reading.
At the same time the rewarding feeling that you did this and made bits
for the car is so cool. I hope some day I have the time to tackle
a project like this.:D
 
I actually read a few sections, as I was copy and pasting it to this forum, and it brought back a lot of memories. :)

I wouldn't have minded going through the entire thread from the beginning, and perhaps making some adjustments, or post-notes, to some postings, Unfortunately I can't edit anything after 24 hours, because of the site's settings.

As I was writing this thread originally, I was getting questions from the (other) forum members, about certain aspects of the build. I didn't transfer there query's over to here, (as they aren't always members of this forum), so I had to edit out a few things, some of which may have been educational to current readers. If I could, I may have been able to write in that added info, in such a way that it flowed along with the part of the build it concerned.

I may do an "After the Build" post at the end of the thread, to cover some of those questions, and add things I would have perhaps done different, and some refinements that were required later.
 
you can also use the comment section, to add more to any pre done reports.
I look forward to more :)
 
The next segment...:)
[h=2]VIN APPLICATION[/h]
I have been dealing with the paperwork aspect of this next vital step the last week. ICBC is nice enough to accept collect calls to their VIN application department, so I have been taking advantage of that.
My initial call to them was to find out what I needed to send them along with the VIN application form. There was several items, such as the bills of sale for the major components, engine, tranny, rear end, wheels and tires, that they needed. Bill of sale from Western Canada Cobras, who is the FFR Canadian importer. Also I needed to include the "certificate of origin", which FFR sends you, showing where the frame etc. originated from.
I also needed the letter from the DOT allowing the importation of the kit itself.
Note- I say kit but it is not really classed as a kit per se, as kit cars are not allowed into Canada. The amount of parts included with the "package" are what differentiates between a kit, or simply a parts package. As I mentioned at the beginning of this build thread, Factory Five has determined with the help of the DOT exactly which parts are allowed to be included so it is not considered a kit car.

I photo copied the bills of sale, for the used Mustang parts I purchased from the wrecker, and as ICBC instructed noted the VIN, engine, and tranny numbers, from the Mustang.
I faxed it all off to them, but rec'd a call the next day from ICBC, saying they needed additional customs paperwork, called a B3 document. Now I never rec'd this document, ever, so I wasn't sure what it was supposed to be. ICBC weren't all that sure either, but non the less they needed it. Hmmm..
I contacted Western Canada Cobras to see if he knew what it was, as he was the actual importer, and had to deal with customs, brokerage, and the DOT. Turns out it is a form showing taxes paid on the optional items that were shipped with the "package" (I got to get away from saying kit
biggrin.gif
) Things such as the right hand rear view mirror, the heater, wipers, etc.. I have no idea why ICBC would need this form, but it may be to ensure that FFR didn't include any "extra parts", that may make the package, a "kit".
In addition, even though I had provided the bills of sale for the used parts, along with the Mustang donor info, they required me to make a "Statutory Declaration" regarding these parts..If a wrecker does not re-register the wreck into his name, this is a requirement. HUH?

Going off track here for a second..I can't fathom why, when a written off vehicle sold at an ICBC auction, isn't automatically signed over to the purchaser? Wouldn't it be common sense to do that at that point?
I mean once the car is written off, the original owners name should be stricken from that vehicle, and ICBC become the owner, until such a time as it is sold at the auction to a wrecker or perhaps a re-builder. They give a receipt for the car to the auction bidder, so why the heck wouldn't the car be registered to them as well a that time? A couple of clicks on a keyboard is all it would take..WTF!

So anyways..I pick up a copy of this declaration form at an Autoplan agent, and fill it all out with the same info I already provided them, IE; used parts purchased, serial numbers etc..and then I need to take it and get it notarized..Fortunately I was able to get in to see a Lawyer the same day. $33.60 later, that was taken care of..

Another sidestep..The elderly Lawyer I went to, had a funny story about him driving a friends original Cobra, back in the sixties, when he was first starting his law practise. Apparently he was driving the car with the owner in the passenger seat, while overtaking another friend, who was driving a brand new 67 Mustang. He said the Mustang kept accelerating as they tried to pass him, so he floored the Cobra, and went whipping past the Mustang at 135 mph. To add insult to injury to the Mustang driver, the Cobra's owner in the passenger seat, sprayed the Mustang with a beer as they flew past...
biggrin.gif
Needless to say the Mustang owner was a little pissed when he finally caught up to them..
The lawyer said, " Man, did that Cobra ever move!"
Good story..

Back on track..I then faxed the B3 forms and the declaration to ICBC's head office. Wednesday ICBC called, and said the new VIN tag was being sent out to the inspection facility on a courier..Yahoo,, that hump is over!

So I now need to wait for the inspection facility to confirm they have rec'd the tag, and set up an appointment to take the car in. I first have to go to an Autoplan agent, and get a "Temporary Operating Permit" The TOP will only allow my driving to the inspection shop, then the Highway scales to get a printed weight ticket for the car, and back to the Autoplan agent. They need to come out and actually see the VIN tag affixed on the Cobra, to confirm registration. I can then insure the car for the road.
Now with the crappy weather we have had over here the last week, I'm praying that I get a beautiful sunny day to do all this stuff, as I sure as heck don't want to do this in the rain..Actually, I refuse to do it in the rain, even if it takes a week or more. There is a limit of thirty days to take the car in for inspection.. we're bound to get some sun before that deadline is up..

In the meantime, I have been fooling around with some minor things on the car.
The AC logo'ed steering wheel center cap I ordered, is to large for the center boss that FFR provides. Apparently they would prefer that we use the FFR logo'ed center cap, which comes with the kit.
To get the AC cap to fit, I took it over to a neighbor who has a metal lathe. He quickly set it all up to trim out the extra 10 mm or so that was needed. The boss is aluminum, so it was easy to turn. He did a great job on it and am pleased with the way it turned out.
I now have to install the cap on the wheel. The cap is helped to stay in place by a rubber "O" ring. Other builders have warned that once this cap is pushed into place, that it can be a real bear to get back out, if one should want to pull the steering wheel at some future date. The o ring causes a vacum, under the cap when being removed. Solutions to prevent this issue, are to either cut a notch in the o ring, so air can leak past it, breaking the vacumn, or to drill a hole through the base of the steering wheel, to allow the same. The advantage of the hole, is that a small allan key or screwdriver can be shoved up into the hole, to help push the center cap out. I think I will go this route..

Here's a picture of the AC center cap, ready to go. The FFR logo'ed emblem next to it, is one of the three included with the kit. It's expected that some may want to place the others on the front and rear body, although they rarely are..You can see the size difference, and the need to have the boss turned on the lathe,

IMG_3147.jpg
 
[h=2]SAFETY INSPECTION[/h]
I finally called the shop where I was going to get my safety inspection done, to confirm if they had rec'd my VIN tag form ICBC yet. It had arrived on the previous Friday. I set my appointment up tentatively for Wednesday, as the weather showed we may get a break from the rain..finally. I also scheduled a four wheel alignment, and wheel balancing for the same time.

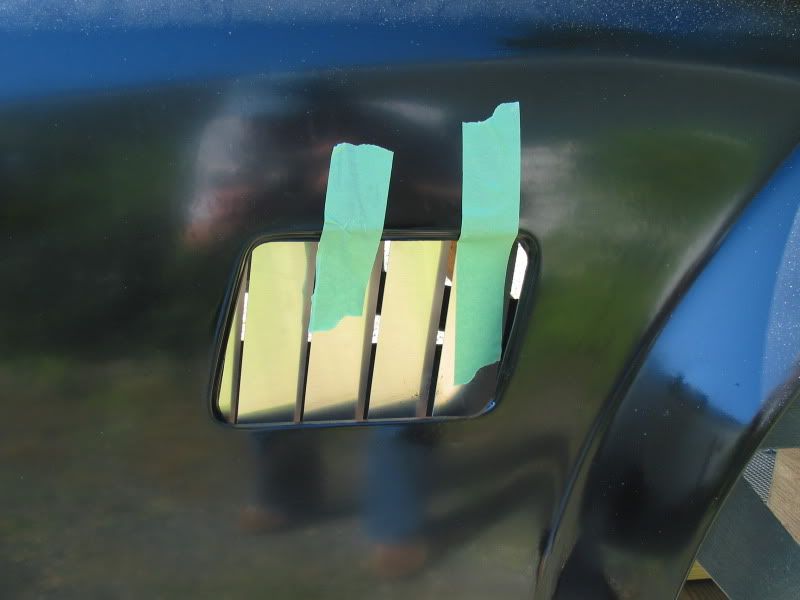
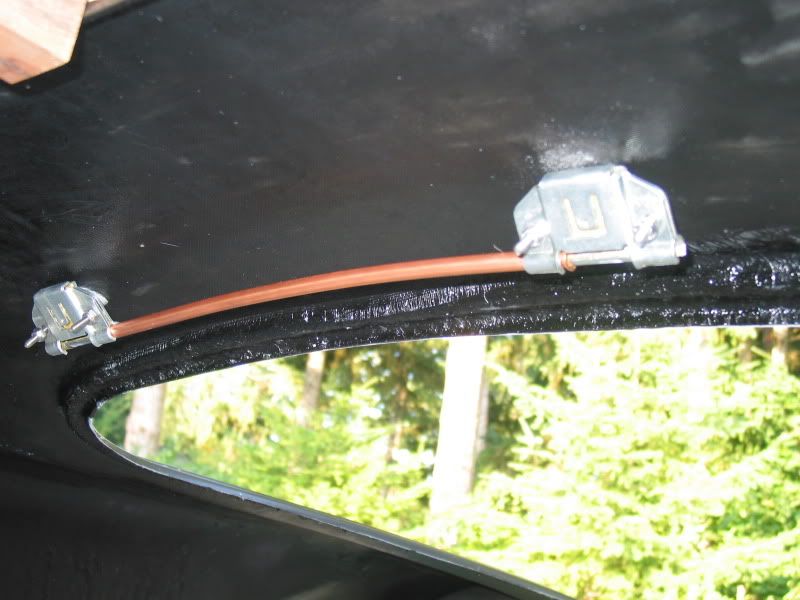
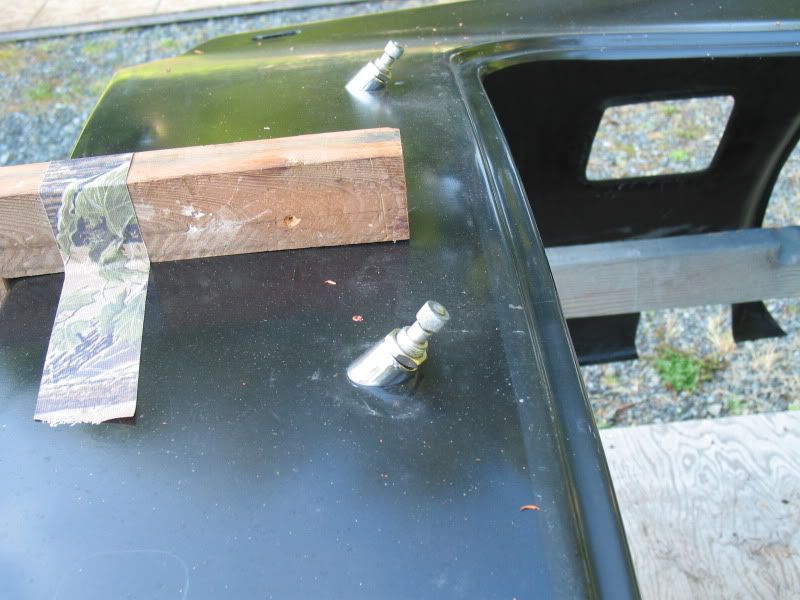
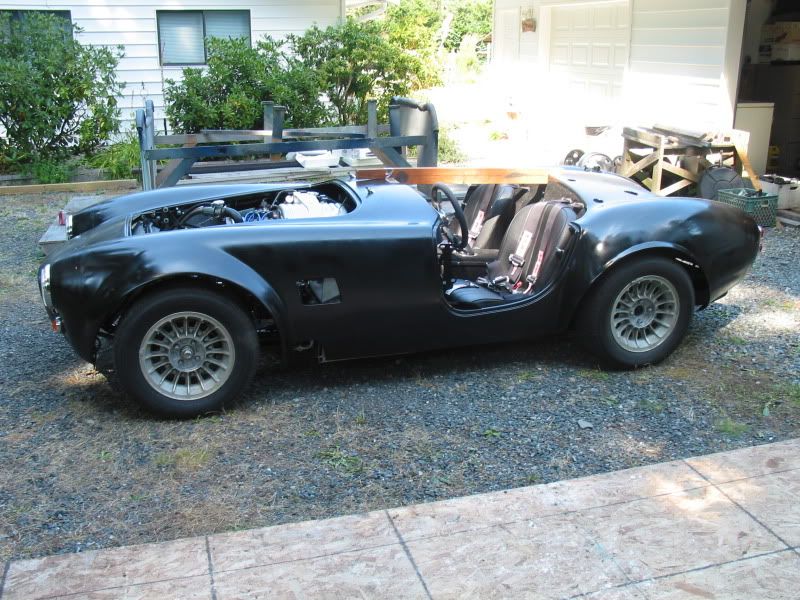
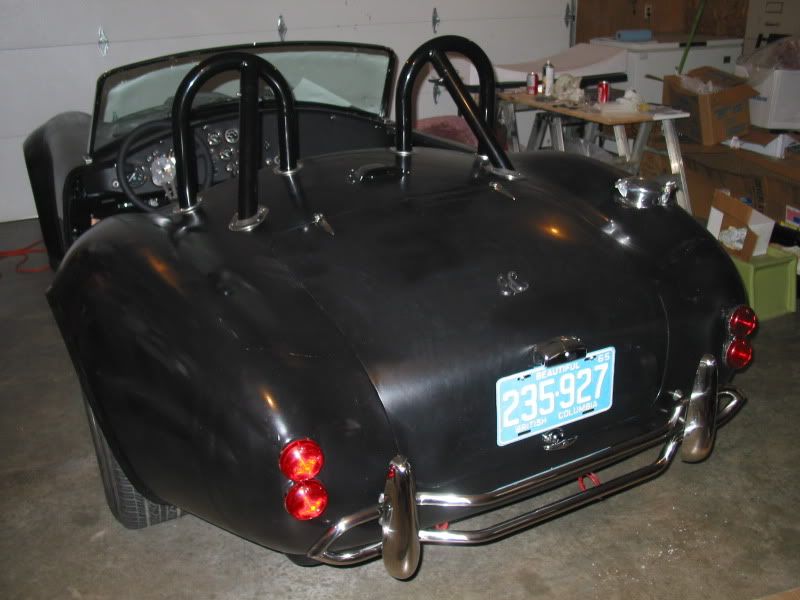
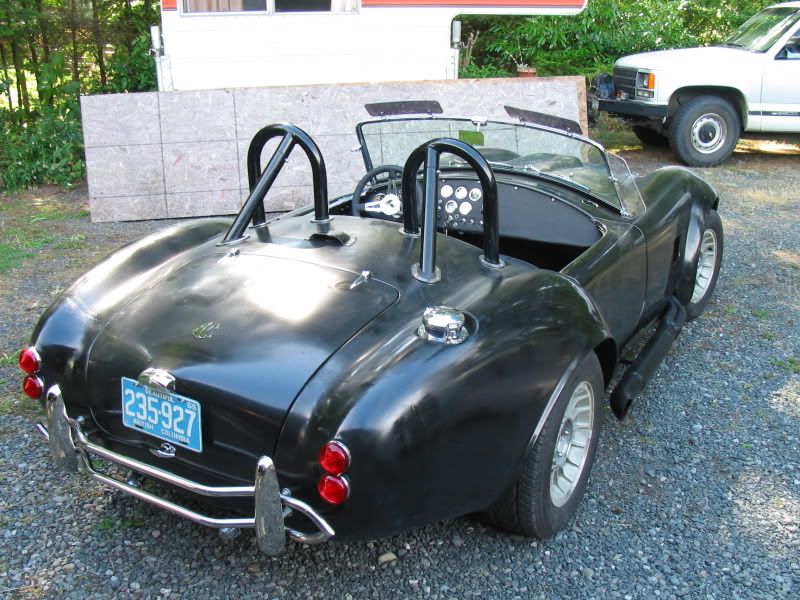
Wednesday morning it looked a little iffy weather wise, with still lots of grey clouds around, but at least it wasn't raining. I taped the Temporary Operating Permit to the trunk, as there is no side or rear window to stick it to, as the instructions indicated.
My first time on the road,,legally..was pretty darn exciting. My first stop was at the MOT highway scales, which fortunately were open, as their hours are a bit of a guess. The MOT website shows them open from 6am to 6pm daily, but many times I have driven past and seen the "scales closed" sign was up. The scales were very busy with trucks passing over them at a rate of about one a minute. I went in to the office, and explained what I needed, and why. They had no problem with it, and told me to drive around to the scales, and to watch the electronic sign board, for what I needed to do, step by step. I pulled on to the scales, once the sign said to proceed, and sat with the engine idling, watching the sign to see what to do next. I could see the weight displayed on another electronic board, and figured the sign would indicate to pull off the scales, but nope..I just sat there. I looked towards the office, and I could see the MOT guy was trying to tell me something. I couldn't hear SFA as the roadsters side pipes pretty well drowned everything out. He was waving his hands around at the same time, so I thought that perhaps he wanted to get each individual axle weight or something, I pulled forward a tad so the front wheels were off the scales. Nope, that's not what he wanted he indicated for me to back up.
ImLost.gif


Finally my buddy came out of the office, where he was waiting to pick up the scale ticket for me, and yelled, "Get out of the car"...Oh.. that's what they wanted,...the cars weight only.. duh..I felt pretty stupid..In the meantime there was a line up of semi-trailers lining up behind me, probably pissed at me for taking so long..sheesh..

Anyhow, the Cobra weighed in at 1030kg with some tools in the trunk, and a 1/4 tank of fuel. That's 2260 pounds for the metric challenged..lol

My appointment at the inspections shop wasn't until 10 am, so we took a bit of a round about route heading there. The car felt great, and I was really surprised how well it tracked, with our simple string and measuring tape wheel alignment.

The tech that was going to do the inspection came out to the car once I booked in, and was really impressed with it right off the bat. That's a good sign I figured. He asked a lot of questions about the build, and as to what parts where new, which were used. He seemed pretty pleased that the brake rotors where all new, likewise with the ball joints, tie rod ends, and suspension bushings. He obviously wasn't familiar with the original Cobras having a V8 in them, as he was really surprised when I opened the hood and he saw the 5.0 engine in it. I suppose that simply looking at the car, one may think it only had a four banger, due to it's small size.
As soon as a bay was free, he asked me to pull into it, and then we went over all the light functions, horn, wipers, etc.. He checked the headlightalignment, which is something I hadn't done, but as it turns out was dead on the money..Now how's that for a good omen..lol

Once he finished that he jacked the car up and inspected the underside as best he could..again he seemed very impressed with the construction overall.
The alignment rack was free, so he got me to move it over. First the thrust alignment was checked, This is to ensure the back axle is true and square with the frame. Sure don't want the crab walk stance while driving. There was very little adjustment needed, as I had done a pretty thorough job of checking this previously. The front wheel camber and caster took quite a bit of time. The computer didn't have the specs in it for this car, so he manually over rode the Mustang specs, and set it to the ones I brought him, that the FFR build manual shows to use.

The whole process took several hours but overall the price wasn't bad at all. They had set prices for both the inspection process and for a fourwheel alignment, and I wasn't charged any extra, even though I'm sure it took twice as long for the alignment then it would for a normal car.

INSURANCE AND REGISTERING
With the safety test "passed" form in hand, I then went to the ICBC Autoplan agent to get my plates, insurance, and registration done. The young lady (cute too) was very good at the process, and had it all done within fifteen minutes. She had to come out to the car to make sure the VIN tag that the shop attached was correct for the registration. I think that "neat" was the word she kept using, when she saw the Cobra first hand..

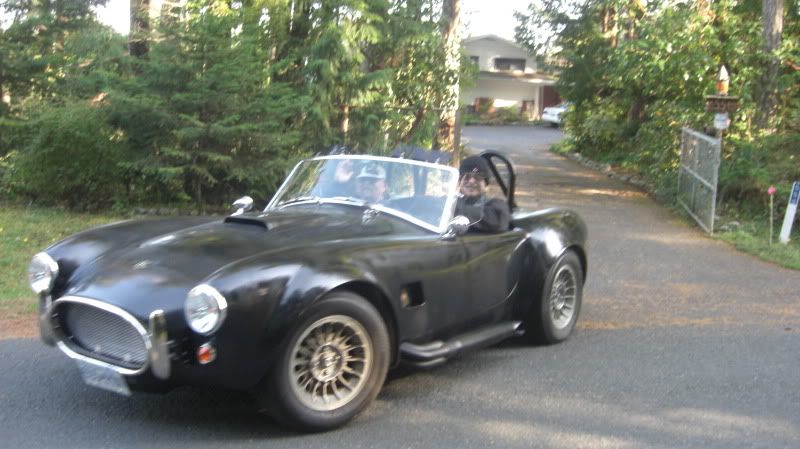
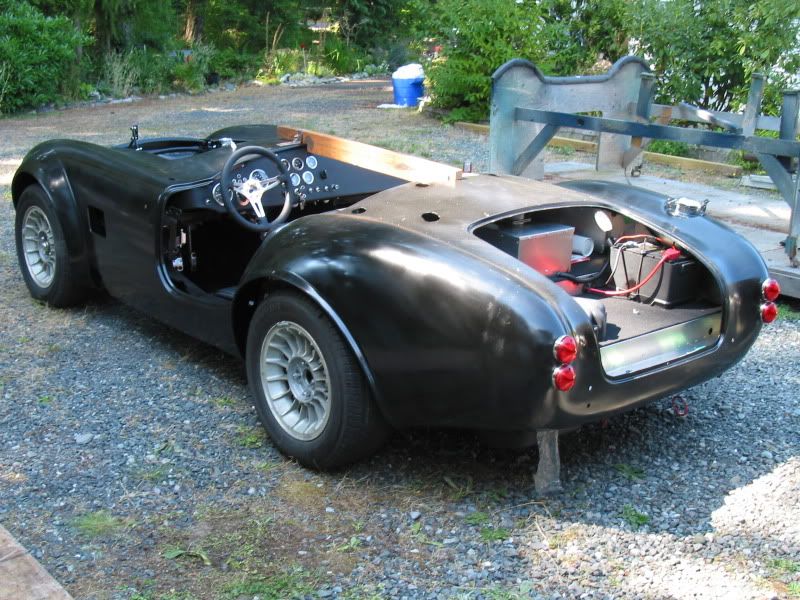
I pulled the TOP sticker off the trunk, and fastened the new plates, and was ready for some cruising..What a great relief that whole process is now behind me! YEEHAW!!

FIRST REAL CRUISE

The sun came out for a little while, and I figured I better go for a test ride.

I had read several builders of these cars complaining that when filling their fuel tanks, that the gas would back up in the filler tube and trip the nozzle over and over. For them filling the car can be a long slow process. I was a little worried this may be the case for me, as so far I had only added gas with a jerry can. Not to worry as it turns out, the gas filling was as normal as any other car I've owned. I could run the pump at full speed.

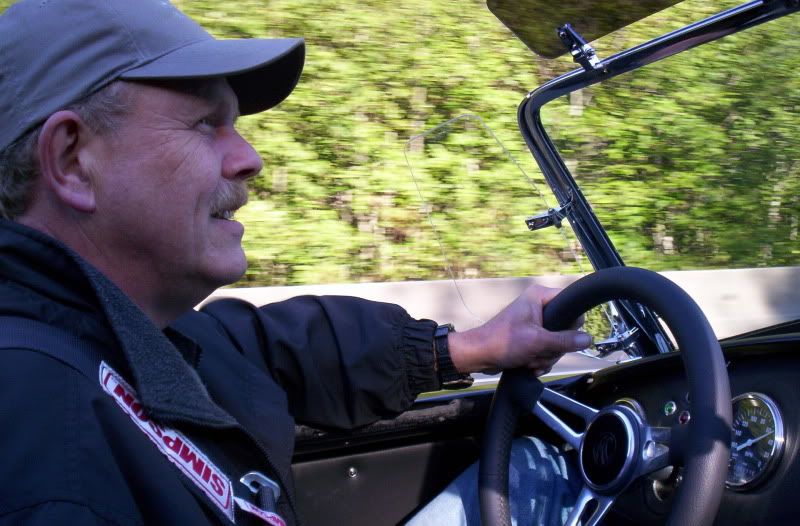
I tooled around town for a few minutes, before deciding to take it up to the highway for a blast. The speed limit is 110kph, and the Cobra had no trouble quickly reaching the limit as we left the entrance ramp. The acceleration is mind boggling, and can really snap your head back when you step on it even just a tad..

The car felt as if it was just coming into it's own at that speed, and even with the 3.55 gears had plenty left. You could easily cruise in 4th gear at 110, 5th was almost to high a gear, but it still pulled good when I stepped on it.
The car handled rock steady at speed, and the wind was not as much an issue as I felt it might be. Very comfortable!

I returned home, and took the Wife out for a cruise. Several builders have stated that their wives/girlfriends refused to ride in the car after their first ride. I have no idea what those cars rode like, but my Wife was really impressed. She had a grin as big as mine as we tooled along at 110. She was really impressed with the heater, as by this time the clouds were back, and it was cooling down quite a bit. I gave her a few samples of the cars acceleration..she loved it! I though that was pretty cool..

I headed home and gave the car a thorough once over to look to see if any leaks had developed, or if anything looked out of kilter, but all looked tight and dry.

The weather turned ugly again on Thursday, and Friday was pretty bad as well. Saturday the roads looked dry enough for another cruise, so I took my Son out for his first blast. He was very surprised at the acceleration, and had a hard time describing it later when asked by others, how he liked the ride lol. He kept saying it was a lot faster than he ever imagined it would be. I think he was also surprised at how I managed the standard tranny. He has never driven one himself. He also was impressed with the cars ride, cornering ability, tracking and smoothness.

Now please note; I never exceeded the speed limits while driving the car, but simply got to the limits very, very, quickly..There is no laws against that, as far as I know..I also never did any burn outs, or drove wrecklessly. I think I can have some pretty good fun in this car without ever driving stupidly.

BUILD CONTINUES

So although the car is road worthy, there are many items that need to be finished, at least temporarily until I'm ready to get the paint and bodywork done.

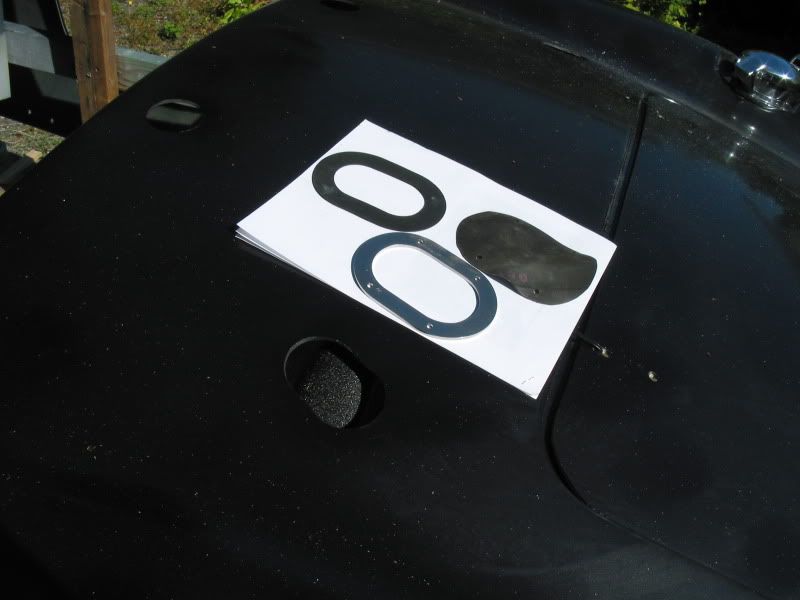
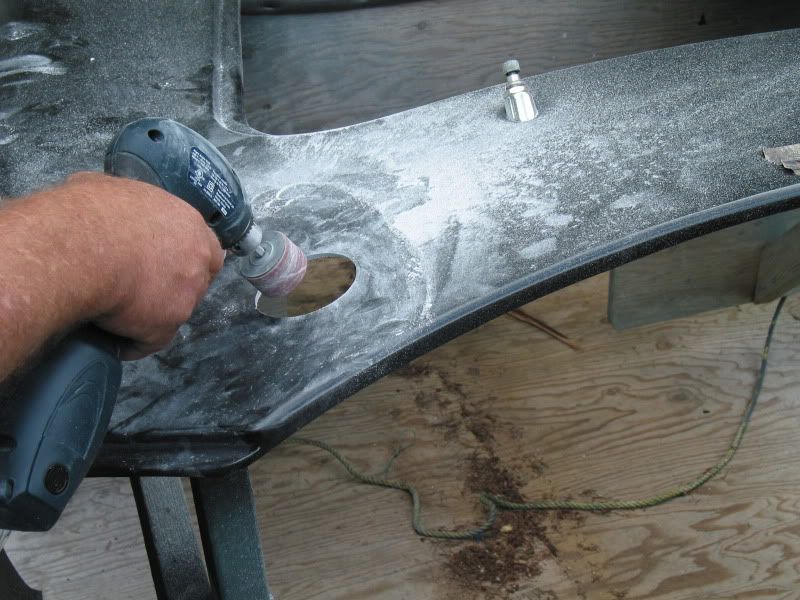
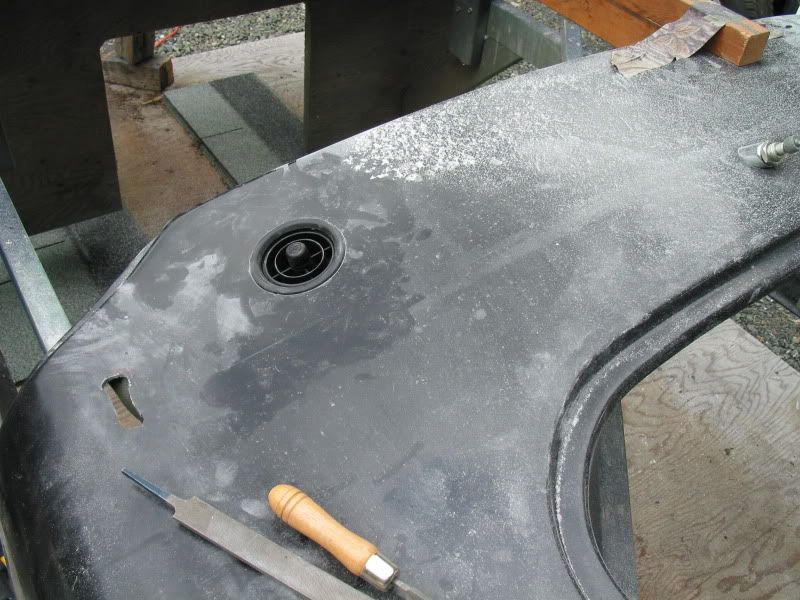
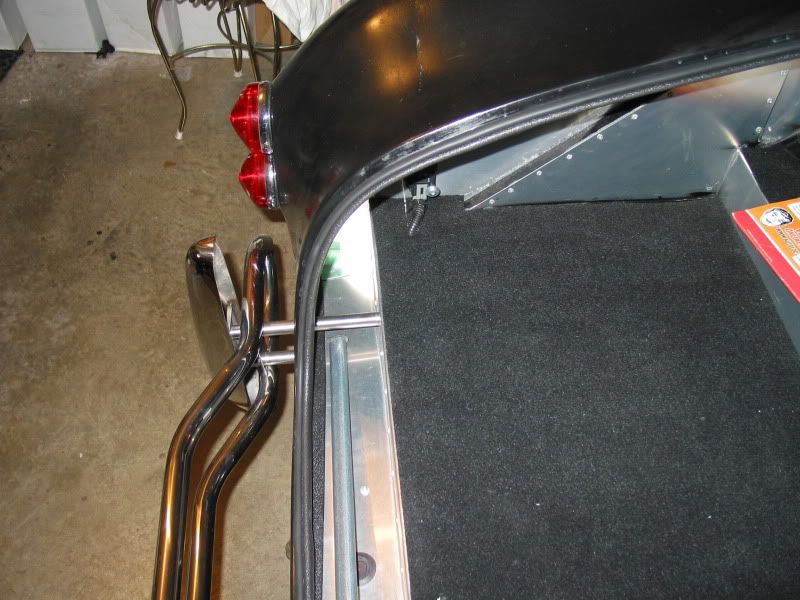
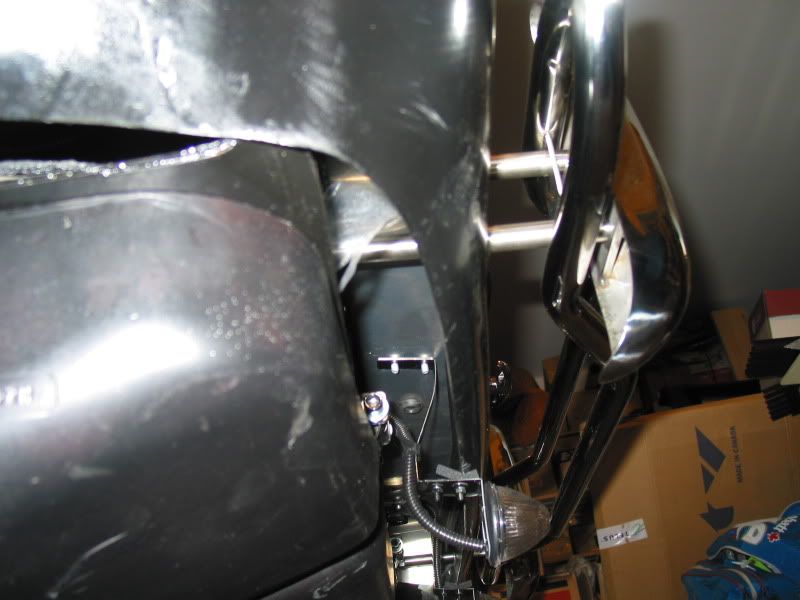
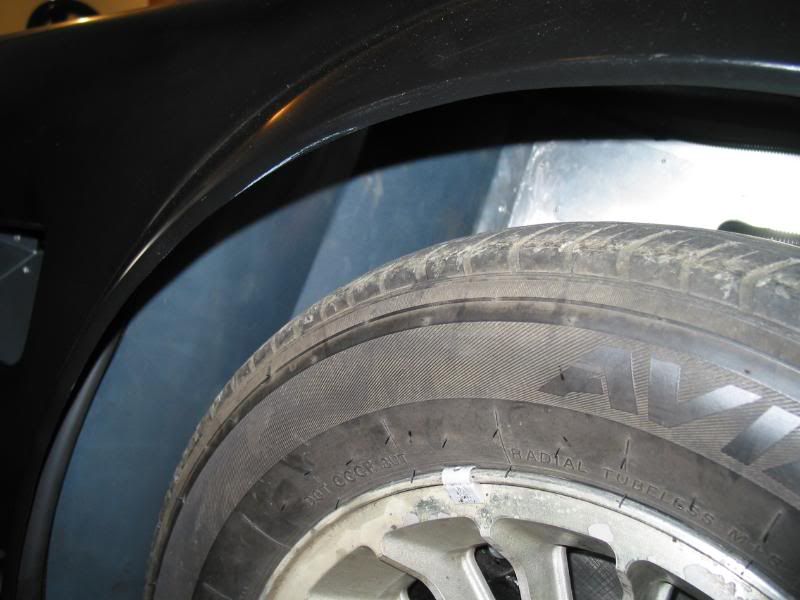
The first thing I need to do, is to seal off the back of the cockpit in the rear wheel areas. There is a few gaps along the back of the rear cockpit bulkhead, where the body sits. I am thinking I may be able to get away with aluminium tape, as I don't want to do anything to permanent quite yet. Some builders use silicone to seal these areas, but as I need to remove the body at a future date, I don't want to have to worry about trying to cut silicone out.

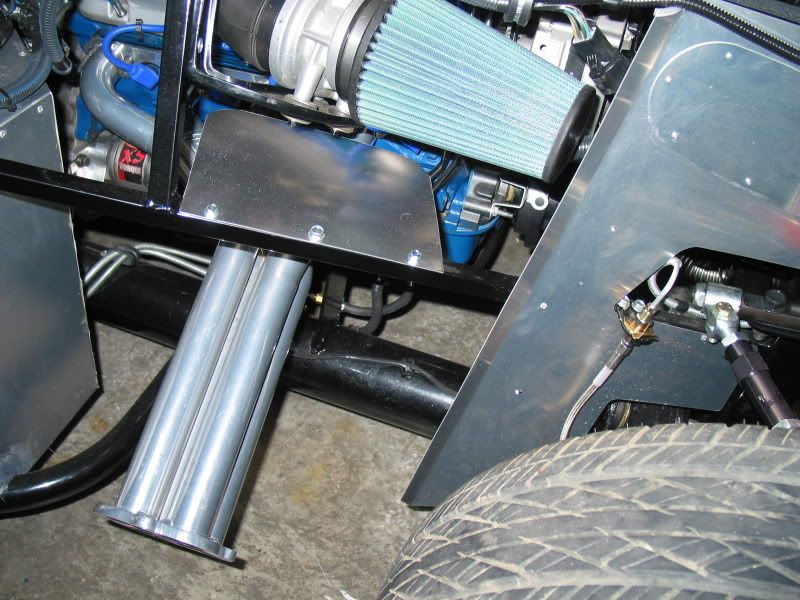
I have heard of some builders complaining about rocks and road debris, bouncing off the aluminum panels, and sounding kind of tinny. Perhaps it's the insulation I used, along with the Dyanliner, but I really didn't notice this as being a problem. I have some undercoating spray that I plan on using, and I suppose I should apply this before the aluminum panels get dirty from driving, and need to be cleaned. This will entail a fair amount of masking, as I don't want this undercoating all over my Koni coil over shocks, or other suspension components. I'll just have to take my time. and do it carefully.


PLUGGING ALONG...

I'm pretty sure at this point I won't bother to install the supplied
gas struts for the hood, and will simply use an old school prop rod. Currently I carry one in the trunk, that I made out of a section of 3/8" aluminum tube, with rubber ends that I fit on. It works dual purpose for the trunk lid as well. It may not be so good on a windy day, as a gust may lift the hood/trunk, and let the prop fall out. I'm going to have to invent some method of keeping this from happening. I may be able to use a couple of prop rod retainer clips off a Honda or something. I might do some digging around the wreckers to see if I can find something suitable.

265 MILES AND COUNTING

I managed a few more runs, as the good weather was hanging in there, and have clocked 265 miles as of Thursday. I was feeling more confident in the car after driving it around close to home, and not finding any issues developed. I decided to do a few more test runs a little further from home.
I took one trip up to Fanny Bay, driving up there on the Inland Highway, and then back home on along coastal route. I took my 75 year old neighbor along as he has always expressed an interest in the build since I started. What a character!
He kept urging me to go faster, even while cruising along at 70 mph.."Let's see what if feels like at 80", or "I bet this car could do 100 without breathing hard" sort of hints..I restrained myself, as the new speeding laws in BC could really make it expensive, as well as the car can now be impounded on the spot, which I definitely do not want! I guess as a retired pilot he loves speed..I did give him a little demonstration of the acceleration at one point, as there is the odd traffic light, even though it's a major highway. He loved that!
lol.gif

As we were aproaching home, and wind and exhaust noise was not as loud due to the reduced speeds, I noticed this odd clicking sound coming from the rear of the car. I tried coasting with the clutch in and it was still there. Hmmm? Sounded almost like a rock in the tire on the drivers side..
I jacked it up when I got home, and looked for anything obvious, but couldn't see anything. I ran it in gear while on jackstands, and could here it both in forward and reverse, although in reverse it sounded slightly different. I then pulled the left rear wheel off, and tried it again in gear. Hmmm... sound disappeared WTF?
As I was climbing out of the car, I just happened to look at the wheel I pulled off, and there was a rub mark on the inner wheel weight. I checked the caliper for a corresponding mark that the weight may have been rubbing, as this is the only thing I could see that the weight may hit. Not a mark?
I stuck the wheel back on, and looked to see where the weight may hit something. Ahhh the e brake cable..I could see that it had changed position ever so slightly, probably pulled down a tad when the suspension unloaded at some point going over a bump. I simply attached a spring to it and then over to the frame, so it would stay clear of the wheel, but still remain somewhat flexible to allow for suspension movement.
It was a huge relief to find out that this was the only problem, and it wasn't a axle bearing, or differential issue!

I took my buddy Larry for a cruise out to Port Alberni on Thursday. It's a nice drive out there, which I haven't done for several years. Traffic was fairly light, and everybody seemed to be willing to do the speed limit. I can imagine the summer months ,with all the tourists, and motorhomes making for a slow drive out that way..
The car performed flawlessly, and the twisting road allowed me to feel it's wonderful cornering ability.
Now the weather has turned, and it looks like rain, I think I will give the car a once over, checking all the bolts etc, to make sure everything is remaining tight, and looking for any leaks etc..
CRUISING
Hard to wipe the grin off my face..
100_1050.jpg


Can't wait to get out in it again!
 
Last edited:
STILL TO DO

I started a list yesterday, of all the things that I still need to do, leading up to the finishing of the car. I surprised how long it was. This fall/winter will be a good time to work on these things, as it's likely we'll be plagued with the typical wet coast weather, and I won't be out cruising..
Here is what I have on my list so far.

-drill holes in hood for rivets
-get tonneau cover fitted
-acorn nuts on door hinges need lock washers?
-clean roll bars of rubber marks (from rubber mallet)
-wax bumpers, windshield frame, mirrors, trunk hinges
-put temporary seals on doors
-fix or replace driver’s windshield wiper wheel box
-install hood rubber bumpers and D seal
-make stainless slotted grille, and mounting braces
-undercoat aluminum panels, and wheel wells
-push in foam pieces at side of foot box’s to prevent wind leaks
-install fender side vents (after installing foam)

Now some of these things are self explanatory. Others such as the "drill holes in hood for rivets", or "push in foam pieces" may need a bit of an explanation.

Since the original Cobras body's were made of fairly lightweight aluminum, some of the body panels needed some reinforcing. One of those spots was the hood, where the hinges were attached. They would add an aluminum tube, that would run under the hood skin across the front edge, and part way back along both sides. This way when the hood was opened, it wouldn't buckle or fold when closed. The tube was held to the skin by rivets that were clearly visible.
Although my hood is already reinforced in the hinge areas, I thought it would lend a nice "original" type touch to the finished car. I thought pre-drilling the holes before final paint is a good idea, as I can lay out the rivet pattern on the gel-coat, as well, I won't need to worry about the drill bit wandering on a fresh paint job..that would suck!
(You can see the hood rivets installed on a couple of the cars I pictured previously, where I was discussing color choices.)

The "foam" business is to do with the space that is between the sides of the foot boxes and the body, on both sides of the car. This gap tends to allow air from the engine compartment to be forced back into the cockpit, while driving the car.
FFR supplies a self adhesive expanding foam with the kit. Normally this is applied to the foot box sides, before the body is installed for the final time. Since I will need to remove the body again for final paint, I didn't want to apply it yet. I have also read on the builders forum, that the supplied foam may need to be doubled up in some areas to effectively fill the gaps. Some of the builders have found that "pool noodles" or water pipe insulating foam works far better, and can simply be forced in to fill the gaps.
I really noticed this air movement when I was out driving the last few times, and although it's not a big issue when the weather is warmer, I could see that any winter driving could make for a chilly ride. Alternatively, when the weather is really hot during the summer, the air being blown back in may be uncomfortably warm. If I simply shove some foam into these gaps now, it won't be a problem later when the body is removed. They can be installed through the side fender vent openings, and then shoved into place with a piece of doweling, or a short piece of wood. I will try the larger water pipe insulation foam, as it is cheap, and readily available.

NOTE- Some builders have used expanding insulating foam spray to do this job. I could see this stuff being used if the body wasn't going to be removed in the future...

Tonneau cover.
I purchased a brand new FFR tonneau cover from another Roadster builder, at a heck of a discounted price. Being he was in Canada, I also didn't have to worry about taxes, duty, etc. Not sure exactly why he decided not to use it, as they are a very high quality product, and apparently fit the cars very well. It may be that he didn't want to start drilling holes in his very expensive fresh paint job ( apparently he spent $16,000 on body work and paint). This is why I would like to have fitted before paint.
A local boat top and upholstery shop will do the installation for me. The tonneau needs to be modified slightly as well, as the way it comes it only allows for the drivers side roll bar. I showed the cover to the shop owner, and he can modify it to look the mirror image on the passenger side. I also feel be has the experience to make the cover fit nice and snug, where I may screw it up, and have it all sagging, and wrinkled looking. $100 to do the mod and install. I feel it is worth it having it done correctly..

This tonneau should come in handy for keeping the pine needles/leaves out of the cockpit if I park it out in the driveway, dust when parked in the shop. As well, it will keep my cats from climbing around in it leaving hair all over, or, if I park it at a restaurant, or a park and leave the car alone. ( The thought of that scares me a bit, as
I have heard some horror story's by other Roadster owners, where they come out to find some stranger sitting in the car getting their picture taken..
eek1.gif
The frigging nerve!)
 
[h=2]What luck! sheesh[/h]
Beautiful day out on Wednesday, cooler, but the sun was shining and clear blue sky's in every direction. There is no way I will drive it even if there is a hint of rain in the air.
A buddy of mine shows up, and says he will fill up the gas tank on the Roadster, lets go for a cruise. What better excuse for a cruise..

A friend of his is a supervisor on a construction site at a new development of fancy homes being built on the oceanfront. He has told his friend about the building of the Roadster, and this person expressed an interest in seeing it. He suggested that we take a run up to show it to him. I was interested in looking over the new development, so why not..

When we arrived, we were disappointed to see a gate across the entrance to the site. I pulled the roadster well off to the side of the road, and we walked around the gate. We were informed the supervisor could be found in the construction trailer.
Several of the new homes had already been finished, and had people living in them, and much of the new landscaping was just finished . Really a nice spot overlooking a beautiful bay.
We find the guy that wants to look at the roadster, and he says he's finished for the day, so we head back down to where the Roadster is parked.

SON OF A B!+(# !!
eek1.gif

Even though it is mid October, and we have had plenty of rain the last few weeks, some idiot has the underground sprinkler on. Sure enough the sprinkler head was aimed directly for the Roadster.. It was as if I had driven through a car wash. The seats had puddles of water sitting in them, console, dash, carpeting was all soaked down..Great...Just Friggin Great..
frown.gif


Fortunately the site super managed to find a clean towel to soak up the puddles in the seats, but our pants were still pretty damp by the time we got home. Every time I stepped on the gas I got a fresh dosing of water right in the crotch, from where it ran back off the fenders, and down the door opening channel..( I haven't installed door seals yet)

I guess this will be one more story I can add to the list of adventures while out driving the car..
rolleyes.gif
 
[h=2]500 Miles on Odometer![/h]
With the sun poking out every few days, I have managed to reach the 500 mile mark on the Cobra. I'm getting used to the pedal arrangement, and steering, and am finding the gears far better than I did initially..lol. I had a couple of instances where I was hitting 5th instead of third, and the odd time when I was going for fifth and hit third. Hitting fifth isn't such a big deal, other than it lugs a bit. When I hit third instead of fifth, I noticed my mistake well before the clutch was let all the way out, so I could quickly correct it before, the rev's climbed..I had to learn to let the Hurst shifter do the job it was intended for, as it will go where it's supposed to if you don't fight it..so I have found. A little different then the shifters I was used to where you had to find the gear.
Overall the driving, handling has been great. Even at the higher speeds it runs and tracks true, with no front end lightness that I can feel. This has been an issue for some builders, but it may be the tires that they are using as well, causing this wandering. Apparently the wider, low profile 17" tires need to be run at very low pressures (22-23 lbs) or they tend to track very oddly. I never liked the though of running a low profile tire on low air pressure. I would think that during harder cornering other issues may pop up..such as the tire peeling off the rim..

i now need to put the car up on jack stands, pull the wheels off, and start doing a thorough check over. I have been doing spot checks after returning from each cruise, mainly looking for water, and oil leaks, or anything obvious.
This time I will check all my brake, drive shaft flange, and suspension bolts, for any sign of thinks loosening. I'll also check all the hoses, cables, and wire harness's for possible rubbing issues.
So far the engine temps have been running spot on, and the electric fan is kicking in and out as it should be. The overflow bottle has been functioning as it should, and coolant level has been fine.

I notice that it takes forever for my oil temp gauge to begin to register. Perhaps I should have tried to find one that starts at a lower range. This one starts at 140*F. and even after a half hour of driving, it just barely begins to register..I suppose I should be happy for that anyway..least it's not running to hot...

Anyone know what the normal oil temp's the 5.0's would run at? [h=2]November update[/h]
Still hoping for an answer pn what the normal oil temp should be running at..anyone?

Did the 500 mile check over, and was very pleased to see that everything checked out fine on the Cobra.

I sure wish I had a lift! It is quite a feat jacking the car up high enough to be able to use a creeper under the car for inspections. I need to get it up so the frame is off the ground about 14-15". Not so bad if you don't use the creeper, but a pain in the ass moving around under the car.

I bought a lightweight racing jack that is a lower profile than most floor jacks. This allows me to get it under the frame, without having to drive the car up on to some planks. Problem with a floor jack is that as the car is going up, it is also dragging the whole car towards the jack. You put the jackstands under one end of the frame, but when you jack up the other end of the car, it starts dragging it that way. This causes the floor jacks either slide, or start to tilt. Pretty scary!..Not sure how to beat that issue.
confused.gif

It might work better if I was to jack both ends of the car up at the same time. This way the floor jacks could roll, as it was being raised, and then slip the jackstands under when at the correct height, then lower both the floor jacks at the same time. Might have to try that, the only problem is you need a helper on hand..

I've been thinking of painting the Turbine wheels, since the weather has been so crappy out recently. I wondered if I could get away with simply using a wax and grease remover to clean the factory paint, then sand the heck out of them. Sanding the nooks and crannys properly may prove to be quite a feat. The other choice would be to use a paint remover, or to take them in and have them sandblasted by a pro..

Sandblasting would probably be the easiest, and prove to be the best method for prepping them for paint. Problem is can they be done with the tires still on? If done in a cabinet type blaster it would need to have a pretty large door on it..
The open air type sand blaster would probably be the way to go. I imagine it would cost quite a bit more as you would be paying for the lost media. I would do all the masking of the tires beforehand, although I'm not sure if plastic would be best, or if I would have to use cardboard or something..I realise I could just take the tires off, and then remount them but this will cost an additional $100+ bucks as they would also need to be re-balanced. There is also the chance the freshly painted rims may get marked up in the tire machine when they re-install the tires.

Anybody have any experieince in this, that could offer suggestions?

Once the wheels are repainted, I could then add the fake knock-off wheel center spinners, that I bought from Corvette South. They really finish off the Turbine rims, and give the car a more authentic look.

Most of the guys who up-grade from their Mustang wheels for the Cobra's, typically buy the fake Halibrand style, as that's what most people are familiar with. In looking through several pictures of some of the early racing Cobra's, I see that there was an alloy wheel that was used, with what was called the "Sunburst" pattern. Apparently this was a substitute wheel that was used when Halibrand couldn't produce wheels quick enough to suit the demand. Keep in mind Halibrand was also making alloy wheels for some car manufactures around that time, so Shelby wasn't their only customer.

I believe the Sunburst, originally designed by Pete Brock, may have been made by Trigo, or Kelsey-Hayes and were used on some of the 289FIA race cars. I have also seen them on the Daytona Cobra coupe.

Sunburst alloy wheel less the knock offs (on a model car yet, hard to find a picture of them as they were fairly rare)
http://images25.fotki.com/v899/photo...rstFive-vi.jpg
Here's some I found on a car. Somewhat similar to the Mustang turbines
Sunburst wheels finally on my Cobra - Club Cobra Photo Gallery

Standard Halibrand alloy
http://www.newstalgiawheel.com/wheel...ubcat3=1011108

My turbines.. fresh paint and the knock offs would really help.
CIMG1434.jpg

 
Back
Top