Turning a Fox into a Snake

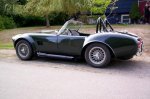
The Snake is home at last!
dancing6.gif


Now I have to really take my time when re-installing all the accessories, mirrors, emblems, lights, bumpers etc. I want to do this right the first time to avoid the potential of having to take stuff off and scratching the paint. Much of it will be the last time it goes on..hopefully..

I started with the trunk lid. I needed to fish the license plate wire harness back through the trunk lid. The trunk is made of two separate fiberglass panels, an inner and an outer, that are epoxied together. Using a thin piece of reasonably stiff wire, I managed after several attempts to create a snake for the wire to follow. I simply tied a loop in the wire, and connected the two electrical wires to it, and gently pulled them back through the small hole at the leading edge of the trunk, back to the point the license plate light mounts. So the wiring wouldn't rattle inside the trunk lid, I then attached some self adhesive foam weather strip pieces in a couple of spots, to act as anti-rattle cushions for it.
The inner trunk lid has an access hole to be able to tighten the nuts holding the light, and for attaching the trunk emblem. The emblem was the next item attended to. After all was secure, I fastened the small aluminum cover that I had purposely made, to cover the hole.

I then decided to tackle the installation of the two left taillights. I couldn't remember if I had the upper one as the signal light, or as the brake light. I figured that the car being as low as it is, the upper light should probably be used for the brake light. I want them seen from behind, as best as possible.
All lights, (2 per side), are on when the running lights or headlights are switched on. To do that, they had to be wired differently than what the manual calls for. You need to splice together one of the wires leading from each taillight, and since they both share a common ground, that wire is spiced as well. The light harness uses a Weatherpak connector to join to the chassis harness. You can pull the pins on a Weatherpak connector with a special tool. That's how I did them in the first place. I guess the painter didn't have the tool, so he cut the spliced wires, joining the upper and lower taillights. Looking back, I should have removed them completely in the first place, but there was enough slack in the harness that I figured he could just pull them out and mask them to paint.
Sooo... I now needed to re-splice the wires back together again. There was no way i was going to solder them together once installed, as the space was barely enough to get one arm up into. I also don't like soldering something held over my face...as it would have to be done lying on my back reaching up under the quarter panel..I used some good quality connectors, and shrink tube to reconnect them instead. Boy.. have the price of connectors gone up since I built the car..US $$ might be the issue. I believe our dollar was only down 8 cents back then.

Anyways after getting that done, and putting some fresh loom harness cover on where it had also been cut, I was in business. Did a test and everything worked..woohoo !

I was about to start on the right side lights, when I thought about how cramped the space was up in the quarter panel. I knew that I also had to reconnect a ground wire to the LeMan's fuel filer cap, which is also up in this area, so opted to do that next.
The copper grounding strap is needed because of the fiberglass body not being able to release static electricity build up. The idea is that when you go to fill up with fuel, a spark may jump from the cap to the pump spout, and trigger an explosion. Never heard of that actually happening on one of these cars, but better be safe than sorry. The logic certainly sounds reasonable. Once again lying on my back, I had to reach up into the inner quarter panel, hold the ground strap eye connector onto a machine screw, then slip a washer, and a nylock nut on...All with one hand. Needless to say that was a bit of a challenge, but along with some appropriate curse words, I managed to do it..
That got me to thinking about the rear bumper installation..Because of the fuel tank already in place, one of the four mounts for the bumper, also has to be reached from this same general area, so I again opted to hold off on the right taillight installation. I needed all the room I could get.

When I was working on the license light, I kept noticing this strange groaning noise every time I opened the trunk lid. I wondered if the painter had reversed the position of the right and left trunk hinges, when he re-installed them. (I had left them on so he could fit the trunk lid gap). Further investigation showed that the lid was actually rubbing the lip on the body. I worried this would lead to paint chipping/rubbing. I recalled that some fellows had to make rubber shims for under the hinges, both halves, the side on the body, and the side on the trunk lid. This lifted the hinges pivot point just enough to give the needed clearance.
So after carefully unbolting the hinges one side at a time. I used a section of inner tube rubber, and traced out the base of the hinge on it. Then with a sharp air of scissors I cut them out. Using a leather hole punch tool, I made holes for the bolts to protrude through, and bolted them back on. And the rubber shims looked like they belonged there.
Using a piece of paper to see if there was still any binding taking place, I lifted the trunk up and down a few times, and voila, problem solved. I love it when things work out..

I thought about doing the rear bumper next, but opted to mount the roll bars instead. I don't have to lie down to do this..
They are quite heavy, so I had to be really careful not to drag them along the fresh paint when trying to get them lined up with the holes in the body. First the 3rd leg has to be slipped into place, down onto it's frame mount. This is the tube angled rearward, and acts as further support to the main hoop. Then the hoop is lowered down, at which point the 3rd leg is supposed to connect to it. Supposed to I say, because this was just not happening. Nope, no way, no how, would the two parts line up. I wiggled and jiggled, pushed and pulled, but that last 3/16" would just not fit. I was in total disbelief. This wasn't my first rodeo with these roll bars. I had installed and taken them off at least three times in the past while building the Cobra, and I was totally baffled as to whey they wouldn't work for me this time....About this point I was beginning to spend more time wiping sweat drops off the car, then actually getting anywhere, so I opted to take a break.

I will attempt them again later. Maybe fresh look, and a clear mind will help.
 
Back at it..
Well after another attempt, I was finally able to get both the roll bars third leg's lined up, and in to the hoop stems.
food-smiley-004.gif


I first attempted the passenger side, which had not been co-operating at all previously. After a few taps with a rubber mallet, they slipped together like a married couple on their 2nd honeymoon. I could hardly believe it!
I was almost, (but not quite), tempted to pull them back apart just to spite the rotten SOB.

The drivers side wasn't quite as co-operative, even after a few whacks with the mallet, but I was sooo dang close. I finally got my Son to help. I got him to apply some pressure in one direction, while I pulled in another, and Bob's your Uncle, they slipped together.
I actually tried this with my Wife, a few days previously, but I guess she just didn't have the muscle needed, to get it that last 1/16". Oddly, there was no tension whatsoever on the third leg, once the hoop stem was inserted. It was easy to spin it round, to line up the bolt holes on the frame, and the hoop.


Now finaly, at least I could move on with other things needed doing..
I was not going to wait until I built and installed, a stainless egg crate style grille, that I had been thinking of. And knowing the Nomex honeycomb rad protector would have to come out of the US, probably not till mid August, I decided to just get to work on the front end re-assembly. I want to be able to cruise this summer. I can do these other things in the winter.

The
headlights and marker light were not to big of a challenge, although I realized after I installed them, that I should have done up the wire harness connectors first. The Weatherpak connectors are really top notch, but a very tight fit. You really need two hands to push them together so they lock. With the headlight out, this could be accomplished by reaching through the headlight hole in the body. Having already installed them, I had to lie on my back and reach up into the front fender area, and try and squeeze the connectors together with one hand. As the car is so low you can't look up into this area, so it took a lot of dexterity to get the connectors lined up in the correct configuration to join them. Once I could feel they were lined up, I squeezed them till my eyes bled, and I could finally feel the click of them locking together. Whew..now... the other side..lol
Please don't ask why I just didn't take the headlight back out to make it easier...thank you..
redface.gif


I then moved on to mounting the front bumper, which was actually very simple...thank God..Everything lined up just the way it was supposed to, and I didn't cross thread anything, so this kind of made up for the harness connection workout. Had it all back in place in about 15 minutes. Although I had the driving lights already mounted to the bumper hoop, I had never wired them up, anticipating they would be coming off when I had the car painted. I had already installed all the harness, with a relay and dash toggle switch in place. Each light is grounded through their mount, and in turn, back to the frame, so I only had to make up a short piece of harness to connect the two lights to the power wire. I love that tube type heat shrink sealer, instead of using black tape. Note to self- remember to slip it on the wire, "before" crimping the connector in place.. I finished by slipping some loom harness cover over the wiring, and zip tied it out of site in a couple places, so it won't flutter in the wind when driving.

To be Continued...
 
Moving along..

So all the lights are now in place. A test showed they were all working properly. Bumpers, and roll bars are in place and fastened, so next, on to the windshield installation.
I initially tried to carry it and set the windshield side posts down into the post holes on the body, but realized there was no way i could do this on my own, without risking scratching up the fresh paint. It weighs quite a bit with it's brass frame, and a fairly large piece of glass. Holding it on one side of the car, and leaning over to try and get the opposite side post in a narrow hole,...hmmm..it's not a one man job.
I commandeered my Son once again, and together we managed to lift it in place, and get the posts in the holes without scratching anything.
Prior to setting the windshield in place, I had to slip on the post seals and bezels, over the posts. These seal and cover any excess space around the posts as they pass through the body. It was so long ago since i had initially installed the windshield, I couldn't remember exactly how I did this the first time. I realized the stainless steel bezel has a countersunk hole drilled in it for attaching it to the body with a screw. The screw hole was on the inside of the post though, where it would be impossible to reach with the windshield in place.
Hmm.? I don't recall removing the bezel screws, when we pulled the windshield off at the painters a few weeks before. They came off at the same time the bezels did, as we lifted the glass off the car, still stuck on the posts.
I suspect now, that they may not have actually been screwed into the body all along, and although they were in place in the bezel, they were simply dangling in the gap of the post holes, and held in place by the rubber seal that they penetrated. I figured this may be what I would have to do this time as well, just stick the screws into the holes for looks. The bezels can't go anywhere as they are held down under the windshield frame. Many Cobra's have the screws on the outside of the posts, so they can be accessed easier.

eb293306e5967a06a62b309dc0a437ee.jpg


Tightening the bolts/nuts, (2 per side) holding the posts to the frame, is quite a challenge. Once again your hands and arms, are twisted into very un-natural configurations, to be able to hold a wrench on the bolts, and tighten up the nuts with a ratchet. On the passenger side, the left arm goes up through the fender vent hole, and back towards the firewall, while the right arm wraps over the fender, in and back towards the fenders rear inner, where the post is. I had to do this kneeling down beside the car, and of course once again your working completely blind. I had marks on my arms for a few hours after doing this..
The drivers side post bolts, are reached via the cockpit and behind the dash. There is a space about 2"x 3" that you have to shove your hand through to reach the bolt heads with a wrench. The other hand, holding a ratchet has to snake in under the dash framing, past wire harness's, and God know's what else, to reach the nuts. Once again your kneeling on the floor, with the drivers door open, reaching forward..very bloody awkward..
frown.gif
 
With the Windshield now in place it's looking a lot closer to being finished !


100_1684.JPG

100_1685.JPG

I gave the interior a decent cleaning, and installed the door trim upholstery.
I still have to install the fender vents and side emblems and outside rear view mirrors, and the knock off spinners. Once that's all done, I think I will have it beat. :rofl

I still need to go over the car, and do a full check out of brakes, suspension components, etc, etc, the same as I do at the beginning of each driving season, but at least I can now go for cruise in it.. I should have it pretty well finished this week.
 
05 gt 5spd;n6654 said:
Looks great Bill, you can park it in my garage anytime!


Is it rodent proof? lol
I have read of a few fellows who park their cars for the winter in their garages, and then find out in the spring it was home to some mice, or even a rat.
That would piss me off, as rats especially can leave a real stink.

Build Finishing Touch's

Even though I'll be soon taking them back off, to do a suspension inspection, I threw the knock offs on, and re-mounted the fender side vents.
I had the side vents painted to match the car. Many of the Cobra SC replica have stainless or aluminum vents, and a lot of fellows leave them metal, rather than painting them.
My reason for painting them, was two fold.
One, the vents as supplied by FF Racing are raw aluminum, un-polished, un-protected by any type of clear finish. They are subject to discoloration, and, they will oxidize eventually.
Two, Many of the early original Cobra's, did have painted vents, done at AC cars in England. Some of the early 289 Slabside's, didn't even have any vents, most others were painted. Some 427 street Cobra's had the vents painted, others did not.


https://www.youtube.com/watch?v=3WxCF1SMVaE
 
For forum members who have lost the ability to view Photobucket hosted pictures, since they started charging ridiculous amounts of money, such as the majority of the ones here in my build thread, there is a workaround now available. If you tired of seeing that message box from photobucket instead of the pictures, try this fix.
I can only tell you how to do it if you are using Chrome as your browser. Apparently, there is a way to use the fix on some other browsers. I'm just not sure how you add it to the other browsers.

Using Chrome,
-First go to https://chrome.google.com/webstore/category/extensions

-.There is a search box near the upper left of the page. Type in Photobucket Fix, and hit enter.
-When I did it there were three fixes available to choose from. All Free. At the recommendation of a friend of mine I chose the "Photobucket Hotlink Fix".
-Click on the blue box, "Add to Chrome", a pop up asks if you want this extension added to Chrome, click yes, or OK.

-If you use "Chrome Incognito", to browse with, you need to go to the 3 dots, on the upper right side, of an open Chrome browser page, Click on the dots, then click on more tools, in the drop down box, Then click extensions in the next drop down box. Scroll down through the listed browser extensions, till you see the new Photobucket Fix that you just added, and then check the box on, OK to use extension in Incognito mode.

You should now be able to see all the Photobucket picture's again, that were posted to any forums you belong to..

This may just be a temporary fix, as I imagine Photobucket might not be pleased to know people have found a work-a-round for it.
 
Little to report as far as modifications, repairs, add-ons, etc., for the Cobra. It doesn't get a lot of miles each driving season, so it's not like things are going to wear out. Brake pads still have plenty of meat. The Yokohama tires still have plenty of tread on them, but now simply based on their age, they should be replaced. It's become a bit of an issue finding 15" performance tires, that are DOT approved, and street legal, in the size I need. The Avids I currently run, have been discontinued by Yokohama in that size. I can't find any from Toyo in the correct size. (I swear by both those brands as very high quality).
There is BF Goodrich tires available in the correct size, but I have read of so many others having serious traction issues with them, I hesitate to go that route. Not to say they are a bad tire, maybe just not great for my light weight car. (2260 lbs) Hoosier makes a performance racing slick, which might be OK for summer driving, but get caught in a summer rain squall, and I'd be hooped.?
I love the look of the Goodyear Eagle "billboard" tires on the Cobras, but damned if they only make them as a bias ply tire. And they are not DOT approved. That could possibly void your insurance coverage, if involved in an accident.. I'm looking at Avon, and Cooper Cobra, as possibly filling the need. The local Cooper tire dealer closed shop about a year ago, so I would have to travel a way's to get a set installed. Canadian Tire apparently sell Cooper, but gawd... how I hate getting any work done on any of my vehicles, by them. I can't envision leaving the Cobra alone with them..?
There is no Avon dealer on the Island, (least that I am aware of), which means I would have to get them shipped to me, at added cost. Then try and find a local tire shop, who will mount and balance them. Some small town business's can be kind of funny/awkward, if you don't buy the product directly from them. I've heard stories of some shops outright refusing to do them. I sort of understand how they feel, but if they don't sell the product you want,.. They are kind of biting themselves in the butt. I have four other vehicles that will all need tires at some point. Am I going to patronize them, after being given the bum's rush?

So just the regular maintenance items, fluid changes, and checking torque setting on a few suspension items. Marking the nuts/bolts, during the build, and after the initial torqueing, has really paid off over the years. With just a glance, it's easy to see if there is any sign of something backing off. Red nail polish works good for this, but I used a red sharpie, as I was fresh out of nail polish..lol
Because the car doesn't get driven in the rain, (unless by accident), and is garage kept, the marks are still clearly visible. If it was my daily driver, or I drove it in the winter, nail polish would be better, as the sharpie marks would probably wear off. Grease pen would work good to, but may not leave as fine a mark as you would like.

It's been 10 + years since it's been street legal, and, knock on wood, there has been no issues with the car. I belong to a few Cobra builder forums, and I have seen where various issues come up for others. One common one was the clutch cable failing. It seems the cable rubs on the tube where it passes through the firewall, just in front of the pedal quadrant. The motion of the quadrant, pulls the cable back, but also pulls it at an angle. This was causing the cables to wear, and fray, and eventually break completely, usually without warning. Imagine sitting at a stop light, in first gear, foot on the clutch, and snap. The car wants to lurch forward, and if it doesn't stall, or you had your foot on the brake, it could cause you ram the car in front of you, or even worse, bump you out into cross traffic. Now back when I was building the car, a few of the builders were saying, do not use aftermarket clutch cables, or even the ones that Ford Performance dealers will sell you. Only use the OEM original, Fox body 5.0 cables, as they were vastly superior in quality and construction. Luckily, that's exactly what I had. Now high quality or not, a cable continually rubbing against metal, should be reason for concern. In the past, I was pretty religious about smearing a dab of white grease on the cable, where it extends out of the inside firewall, to the quadrant.
Reaching the clutch cable, from up under the foot-box was never an easy feat. To reach the cable to dab some grease on it, was an exercise not dissimilar to a contortionist on Cirque du Soleil. You need long arms, and basically being able to turn your upper body 180 degrees to your lower body, as you kneel on the floor beside the car, door open as far as it can go, and reach way up above the throttle pedal, with your right arm, trying not to smear the dab of grease all over the place, while trying to feel for the cable. And you need to place the grease in the tube the cable protrudes out of, to have the desired effect.
I must have got old, or I'm out of shape. Or both. I'll blame it partially on the Covid lockdown the last 18+ months, which has restricted my usually active life. This inactivity has lead to Googling up recipes for meals I would never have had time to prepare previously. Fortunately, you may recall that when I built the Cobra, I had modified the drivers foot-box top to be removable. Removing the eight or so screws holding it in place, a bit of wiggling, and a tug, and off it came. Now I could easily access the cable without putting my spine out. I don't know why I hadn't done it this way in the past, other than it took twice as long this way.

Note- Since I built my car, many new builders are now installing hydraulic systems. It costs more, installing clutch master, and slave cylinders, and is more complicated, and time consuming. No fear of a cable breaking though.

Here you can see where the clutch cable passes through the foot-box to reach the clutch quadrant. The blue tube visible is the firewall mounted cable adjuster. It's where I need to place the grease. With the top removed it's a breeze. Imagine trying to reach that spot from underneath the dash..This is a picture taken during the build, no tension on the cable yet.
1626812575549.png

Visiting friends that were RV'ing. You can see how good the tread still is, even on the back tires.

1626813613300.png
 
A note on tires and Canadian tire.

Canadian tire do not sell the top tier tires of the manufacturers they carry.
Top tier is reserved for tire shops.

So if you get BF Goodrich from the Michelin tire shop, because BF Goodrich is part of the Michelin family, I’m confident you will get better quality than whatever you can get at CT.

On BF Goodrich tires, I drove a set on my 2005 and they weren’t bad.
I think they were a 400 tread wear, and I took them to the track and made out pretty good.
I was new to the game then and hadn’t known stickier tires yet, so I made due.
Since then, I’ve had opportunity to drive summer only, top performance tires in 300 and 200 tread wear and now know the difference.

Dry traction is highly related to tread wear rating and wet traction is highly related to tread design.
Common BF tires tend to be generally higher tread wear rating than similar looking Michelin or Good Year so they are budget friendly.
This may explain some of the feedback you received.
BF Goodrich are kind of the whiskey tire for people on beer budgets.
Performance tires but at a higher tread wear than similar looking Good Year or Michelin.
So they cost less for a similar looking tire.
Especially if bought at discount locations such as Costco, Walmart or CT.

That higher tread wear rating equals relatively lesser traction.
But top shelf BFG’s with low TW are very good tires and BFG do make quality track tires.

I wouldn’t concentrate on brand names so much as tread wear rating.
Compare the TW on your current tires to the TW of the BFG’s in your size.
If they are close or similar TW and you get the BFG’s from the Michelin store, you should be good.

By the tread design in your photo above, the tires you have now are not summer only, top performance tires such as a Michelin Pilot.
So BFG should be able to match up pretty close to what you have now.
And being new rubber they should have decent traction compared to decade old rubber.

This is all based on fact that your other options don’t seem easy to obtain or achieve.

Good luck in your search.
 
There could possibly be some quality variances between retailers, for the same tire. I know that happens with tires supplied to car manufactures. Two different make of cars can have the same identical looking tires, but they can differ greatly in quality.
I could perhaps see that with Wal-Mart tires. . You would hope being a national large tire dealer, that Canadian Tire would get the top quality ones. Who knows for sure though? They aren't likely to tell you if asked..lol
I took another look at the specs for the BF Goodrich again. For the size I need, the only one they show available has a TW of 400, and the speed rating is S, which is kind of low. 112 mph max? I wouldn't even be out of third gear..:)
 
Must be nice to drive in Mexico like that. ?

I see where you’re coming from.
The speed rating is also important to consider.

Well, again, good luck in your search.

Have them shipped and tell the local shop that you have ability to do future patronage with your other cars.

Or get dealership to mount them for you.
They’ll charge hourly rate but won’t give you hard time over what make they are.
 
I buy my tires and have changed at Ford, they charge me normal tire rate
and have very high tech tire changer, they don't touch the rim.
Common here now, which I like. Most decent tire shops should change.
 
Last edited:
Other than two car dealers, we only have one tire shop in town, although there is a Canadian Tire on the outskirts of town.
I should do some scouting first, and see if any of them would be game to it. There may be a few repair shops that aren't big on selling tires, but have the tire change machine and balancer needed..
I do all my own repair and maintenance on our vehicles, so I've never developed a relationship with any of them.
 
I spotted this gem the other day, and think it would be great for the Cobra. Even with the Hurst shifter I currently have, which is supposed to prevent mis-shifts, I have managed a few times to miss 3rd. Also the odd time I have difficulty after stopping, getting into first gear, and I start rolling in third, before realizing it.
Pricey unit though.. Anyone installed one? I really need to look over the reviews.
https://s1sequential.com/product/sequential-shifter-t-5/?ph=8428047ca0bfafa7abb1d435

1656668115706.png
 
I spotted this gem the other day, and think it would be great for the Cobra. Even with the Hurst shifter I currently have, which is supposed to prevent mis-shifts, I have managed a few times to miss 3rd. Also the odd time I have difficulty after stopping, getting into first gear, and I start rolling in third, before realizing it.
Pricey unit though.. Anyone installed one? I really need to look over the reviews.
https://s1sequential.com/product/sequential-shifter-t-5/?ph=8428047ca0bfafa7abb1d435

View attachment 57347
T-5 is really good, price isn't bad, but looks like Aussie, shipping could be brutal lol.
Sequential shift would be wicked.
 
Back
Top