1983 GL, project: Cheap Thrills

Al-rightly.

Up early on a Sunday so lets get this damned floor finished today!

All I really have left is a little rust repair around the firewall and get the floor burned in at the rocker panels.

Then I can move on to the cowl repair or do the subframe connectors.

Probably the subframe connectors as my torque arm rear suspension is scheduled to be UPS delivered tomorrow.

That way I can get it out of the boxes and on the car to minimize how much space its going to take up in the house. I'm already spilling out in to the basement rooms with piles of parts......
 
Well, it's done:

4E5491FD-BBE9-4F54-964B-041998A20E90_zpsrfci8sno.jpg


Pretty?

Not really.

I got tired of grinding out the welds at some point and started not worrying about how it looks. You can see that in the seat mount welds and a few small patches added to the firewall after I discovered a few localized rust pocks. It's already altered so it's never going to be a "concours" car. I wouldn't want that anyways: booooooorrrriiiiiinnnnnggggg! That's fine for some guys, but I want to drive the wheels off it!

Functional?

Yep.

smile.png


Still have to hit it with seam sealer.

I've got a small section to weld from under the car where the cross brace is but that's not a big deal as it's going up in the air soon in order to do the subframe connectors and the rear suspension.

It will be sitting on it's suspension to do the subframe connectors (jackstands under the rear axle and ramps under the front wheels) and on it's frame rails in order to do the rear end.
 
Last edited:
Tried out some super-duper glass polish we use at work on aircraft canopy's:

D893056C-B0E2-41DC-A9D6-234BE7D525A5_zpsqqct8jy4.jpg


Daummn! It's so clear you can't even tell there's glass in there!

:rolleyes:
 
Last edited:
lol, Wow it is good, should market it privately, all car guys pet peeve
a good glass cleaner :)
 
So I've got the floor replaced on the drivers side. Now to tackle the reason it rusted out: the air horn in the plenum rusted out:

E5135C23-947F-4815-BC14-BA9C2991E7D9_zpsxfcphyqw.jpg


and leaked (non ac car) then soaked the carpet while the car was in outside storage.

I pulled the windsheild out, the nose and both fenders.

Then, while looking at the sheer number of spot welds to get the upper cowl out to access the plenum floor:

2965048E-21E7-43F2-9957-153539EB2CEC_zps80jjcahf.jpg


i thought to myself theres got to be a better way.

This is a structural parts of the car, it will take forever to get it out and if my plug welds suck (they usually do) the car is weaker.

so now im thinking i might just slice off the divers side part of the cowl:

8B09821F-7AE4-4630-92A0-ECBB5799610E_zps6q9yppih.jpg


I can do the cut below the surface on the panel sides and across the top under the vent grill so the welds would all be hidden. I'd smooth them out anyways, but hidden is always better. This would give me access to the area in the plenum i need to replace and not mess with the spot welds in the windshield channel or all the way across the engine bay firewall seam.

Only hitch might be the wiper pivot. Have to look a little closer at what structure is in there.

Thoughts?
 
Took the plunge and cut off the top panel.

F'N G-D MICE!!

845B5A76-FFB6-4AFC-BB4B-F9B43EC2EFB4_zpsorzn5pek.jpg


GRRRRRR!!!!!!!

Made his bloody home in the recess under the wiper cowl! With jute from the interior and shredding the once pristine hood pad no less!

There's a drain right there for water, so guess where all his toxic corrosive pile of p!ss went?

4380B917-1417-4D5A-98B6-65472043601F_zpsytn4olbk.jpg


That's daylight you see through that lower plenum floor.

What I though was just rust from debris pile up was because of one friggin mouse!

Which also took out the drivers side floor......


GRRRRRRR!!!!!!

mad.png


Well, at least it's fixable and not as bad as I though it was.

I'll pop out the spot welds on the air horn, a quick clean up with a wire wheel, a few patch pieces, paint and back together it goes.

Then I can move on to the subframe connectors. While I'm down there, I' going to seam weld the existing subframe stampings to the floor for added strength, just in case my plug welds aren't as good as I think they are.
 
Last edited:
Brown truck just left.

I have no space left in the garage now!

Will have to take over a room in the basement for storage.....
 
Well, started to pull the entire cowl piece off. I was working at removing rust amd more holes showed up.

Rather than chase them, I just decided to cut the spot weld and access the entire plenum. Pita just with so many spot welds, but I'll be able to clean and paint the entire plenum now. I'm finding light dusting in the pinch seams anyways, so it not all bad to pull the whole panel....
 
Ugh, I despise rust repair.

Took the cowl off:

4C752C77-52A1-4E57-9C50-815040B657E9_zpsiocem1uq.jpg


Then cut out the rusted piece around the air horn:

53996F0A-E2D1-46F4-B002-59A2D97CEBCE_zpsqqfszbcs.jpg


What a mess:

97E2BA69-BEA9-4202-B9FE-51D7383D7418_zpsxvsm5oph.jpg


Oh well, at least I will be able to de-rust, paint and seal the entire plenum floor so I should never have to open it up ever again...
 
Used the original rotted out piece as a template:

F2BAEAB1-F272-40D2-B66E-85CD8BDC04DC_zps4ppdeiza.jpg


Start of the new piece:

399CACA8-D775-4979-A1E0-5D8DF4E6E8A8_zps5sjcftsl.jpg


It's not perfect, but its also the first cut so it's not bad either. Further work will get it to where it needs to be.

I'm just going to seam weld a new air horn to the opening rather than spot weld. Will make it easier for me in the long run.

There's a reinforcement piece that welds underneath to hold and position the vent duct. It has to be positioned just right to line up properly with the dash vent opening. I'll use the rotted piece to locate the spot welds (drilled out holes in pic above), drill the same size hole in the new piece and the old spot weld on the reinforcement piece will line right up. Should be at least close enough to locate the vent properly.
 
Last edited:
You are bringing back memories, or maybe nightmares of the work done to my first couple of "on road " vehicles. They were not mustangs but I can appreciate the work you are going through. It's painful to be almost done then find a " little area" that ends up with another major rework. All worth it in the end ! Keep posting the progress, hope to see it on the road spring of 2017
 
I was thinking same thing, few old cars we replaced floors and panels,
cheap paint jobs, I don't miss the olds days, driving and fixing junk LOL
I can't weld, so always needed help, or pop rivets.

Kids today, have no idea :)
 
Yeah you are right Trevor. We did not care what we drove and our friends did not either. If you had the wheels it was not hard to fill that car up to go to Macdonald's at lunch. My son just got his beginners and the cars that he talks about wanting to have are just out there in price for the most part. I told him start saving more because your tastes and my budget are not on the same page. Lol
 
Ive always bought my own cars with my own money.

Only car i ever did not pay for was my dads old 78 tbird he gave to me a long time ago. It was far from "new" in many ways.

I dont know how parents these days buy cars for thier kids. Hell, i have a hard enough time choking down the cost of a new (newer) car for myself let alone buying one for my daughter.

That money is going to her tutition and books, if i can manage to get that much together by the time shes ready for post secondary that is...

C'mon scholarship money!

:)
 
Minor Thread Hijack Alert

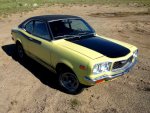
Project 1st road car involved 3 Mazdas Engine donor was a 72, and two 808 coupes that turned into one and at least a sheet of body tin

5865426176_007cd4e2a9_b.jpg
 
I will add to this, My first street legal car ( first car is story for another day)
was a 1968 dodge dart, 4 door slant six. 68 and 69 donor car and cheap paint job
plenty of fixing, was good car for 2.5 years. I suspect the first 20-30 cars
I did more than my share of repairs.
 
Yeah I will definitely not be buying him a car. The deal was you save some money. We will give you what we can and you work on repaying us. Did that for his scooter and it worked out fine. Need to teach them the basic Skills in my opinion. Never got any free ride either.
 
Coming along nicely:

DBA595F3-A2F0-4307-99F3-88E85051B902_zpspmib3fhb.jpg


First burn in. Grinding it down and decided to end the day on a high note with the panel solidly in place. My grinder disc needs replacing anyways. I'll run out tomorrow morning and grab another.

I also drilled the spot weld locations and fit the vent duct retaining ring:

AB5EE218-93A3-49FA-9BB6-34426849C7B0_zpspqrgskdj.jpg


B7255998-BBC4-4058-A51C-82FE38FB3B12_zpscvcqi5vb.jpg


Doesn't get much better than that! The ducting will be in the same location as when Ford first put it together as I transferred the spot weld holes off old rotted panel by laying over the new once it was burned in. If nothing else, it will sure be close enough to fit up to the dash vent. Ford production tolerances were "liberal" enough that even a slight out of position should work just fine.

Tomorrow I'll finish grinding, mig up any pin holes, finish shaping the vent opening, strip the rest of the plenum floor and give it a coat of DOM 16.

With any luck, the upper cowl will be back in place by Sunday night and that will wrap up the big rust repairs.

Then I can get back to installing new bits on the car like the MM rear torque arm suspension kit!

:)
 
Last edited:
Back
Top